Integrating n8n Webhooks with Blitzit
This integration lets you send tasks from other apps to Blitzit automatically using webhooks via n8n.
Setting Up the Integration in Blitzit
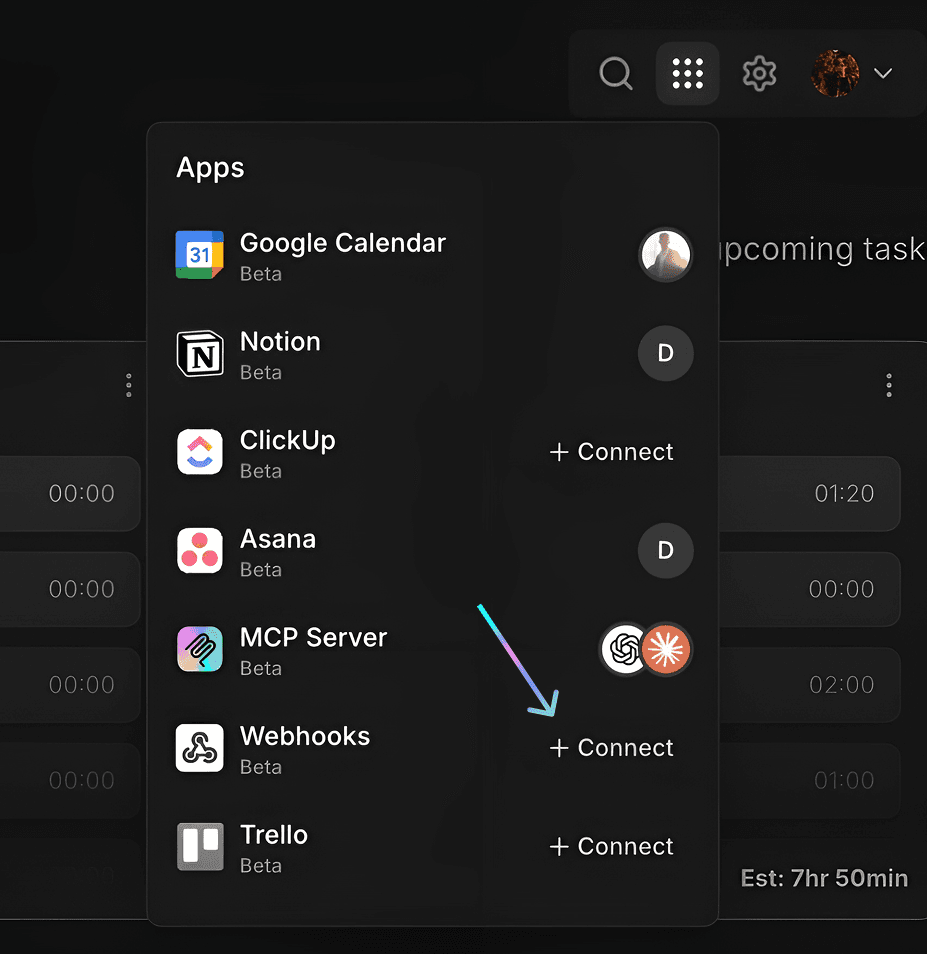
Go to Integrations (⋮⋮⋮ button on the top right), then select Webhooks.
Select the lists you want to connect.
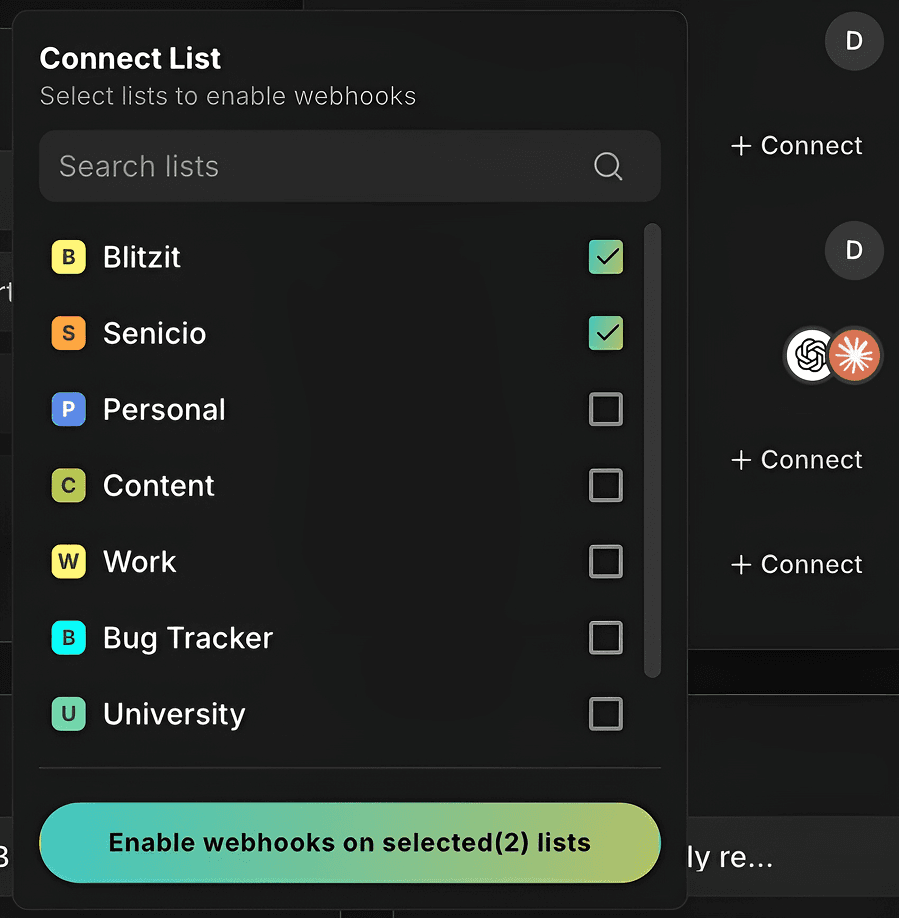
Click Enable webhooks on selected list(s) to confirm.
Open any connected list and click the Webhooks icon (top right) to view settings.
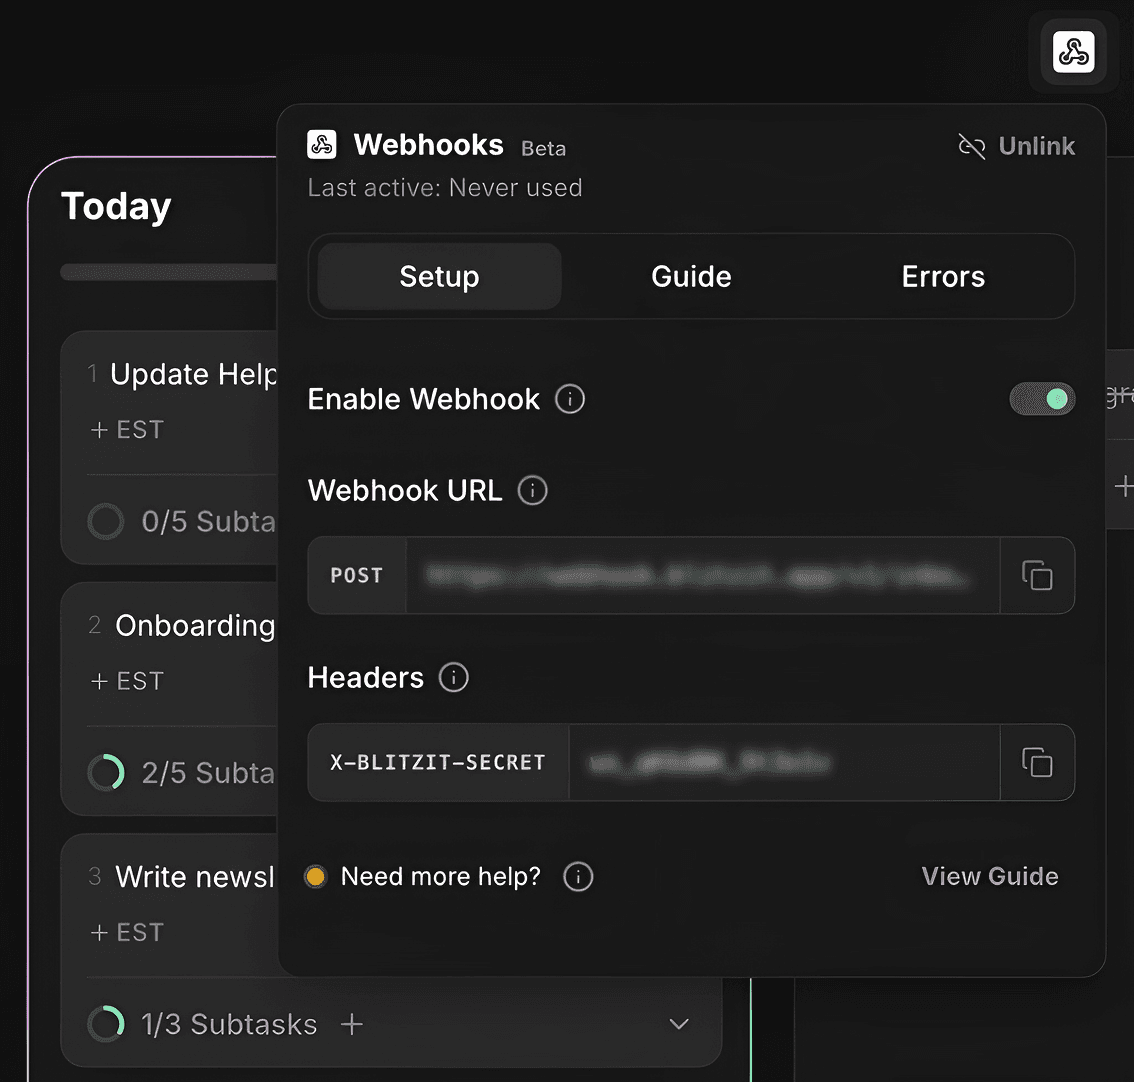
Copy the Webhook URL and Header with Signing Secret (blurred on screenshot). You’ll need these for n8n.
Note: Each Blitzit list has its own unique Webhook URL and Signing Secret.
Creating Automation in n8n
For the purpose of this guidance, let's set up a connection between Blitzit and Linear.
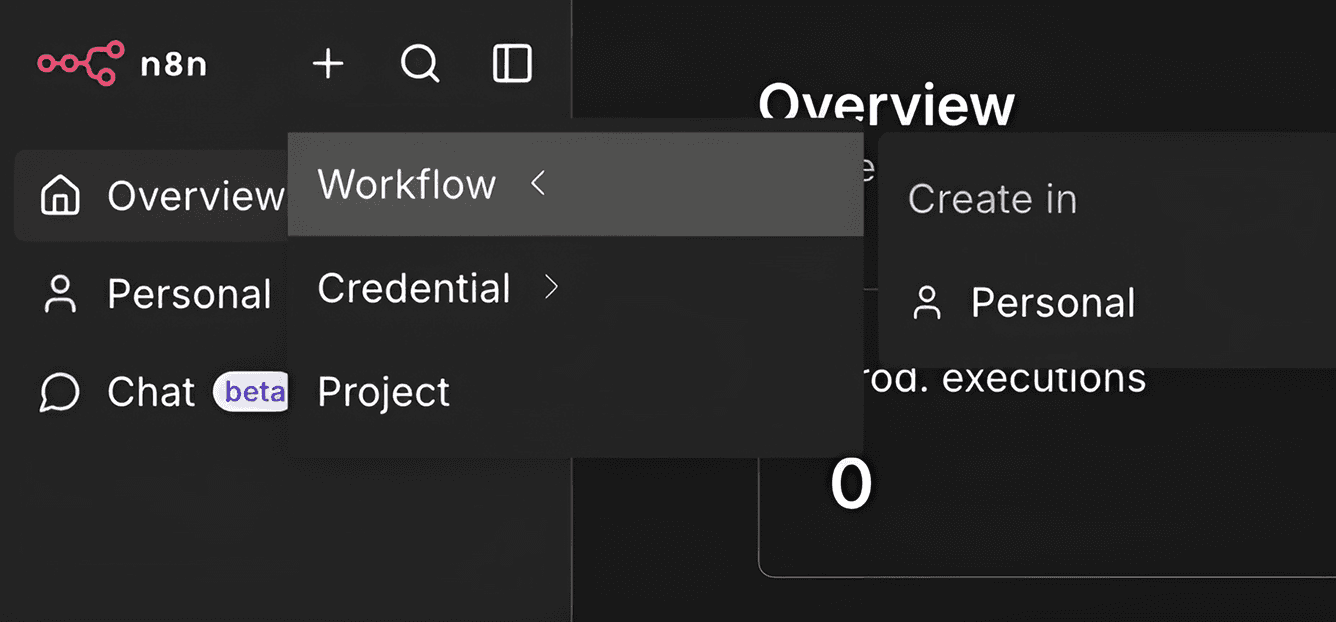
Go to n8n and press the + button on the top left and select Workflow. Choose Personal or any other space where you want to create the workflow.
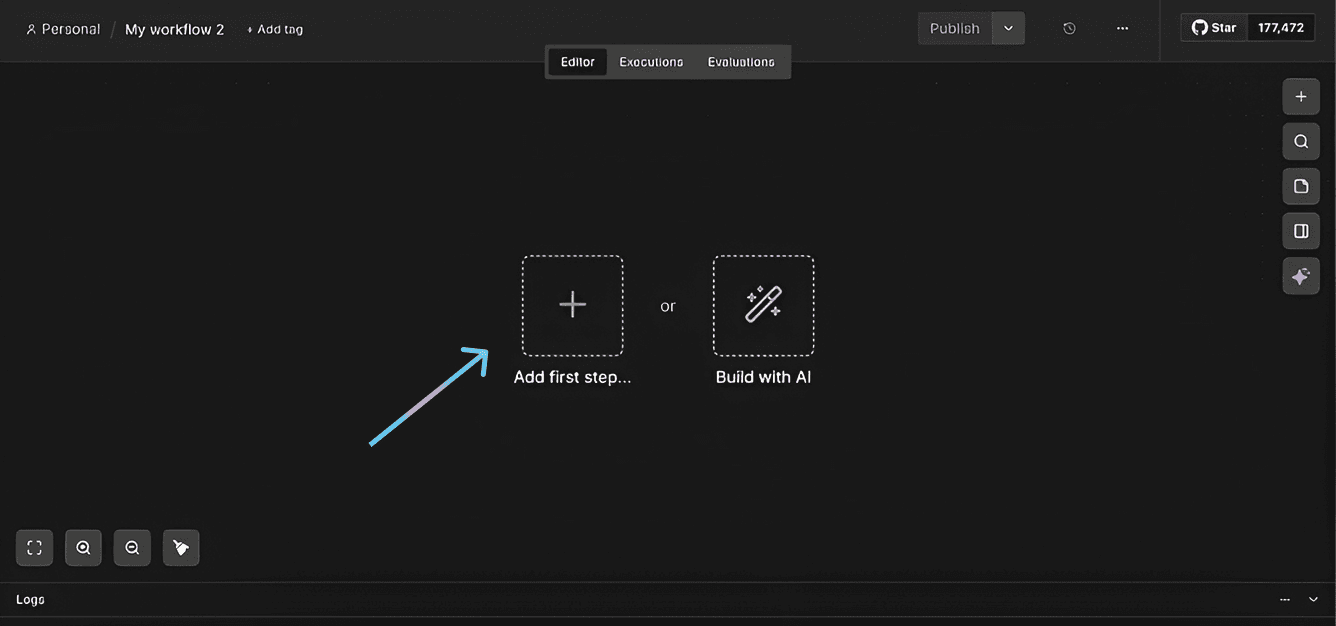
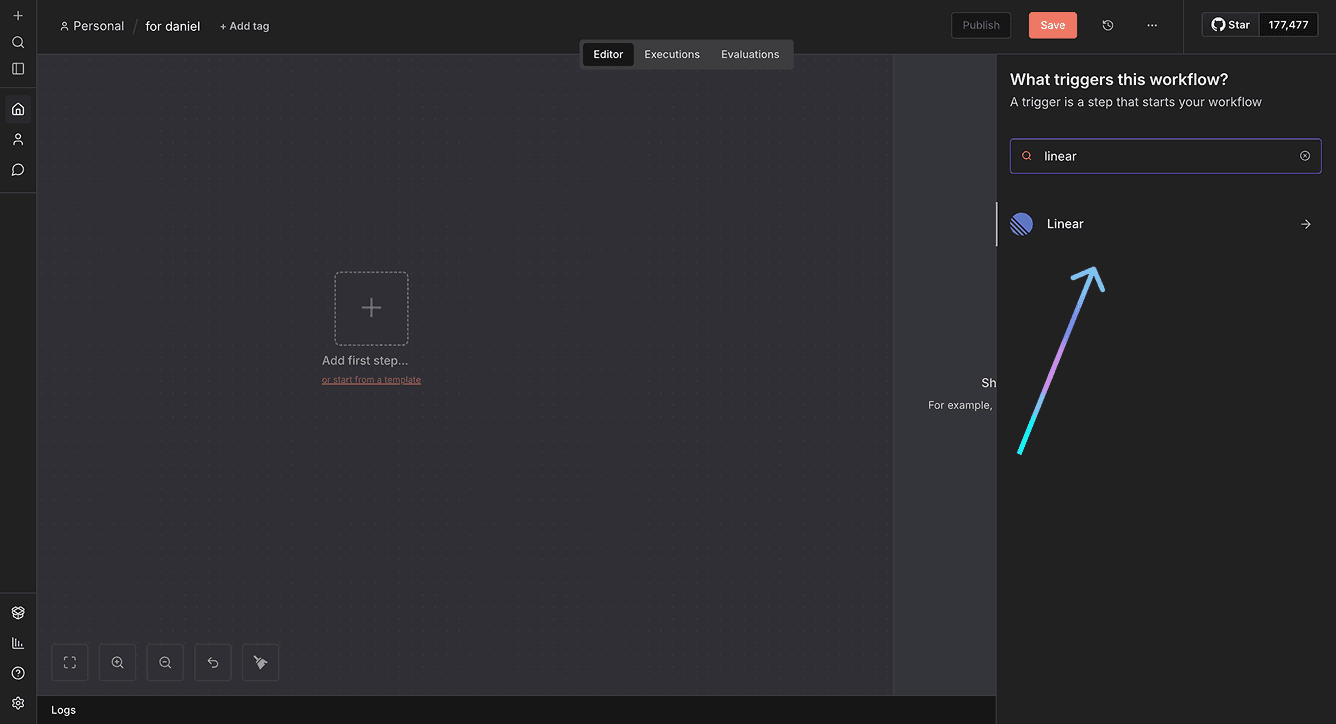
In building mode, press the + button to create a trigger. Search for Linear, select it, and choose On new Linear event as the trigger.
To connect n8n to Linear, you need to create credentials:
Press Select Credential → + Create new credential.
A new window will open with an API key field.
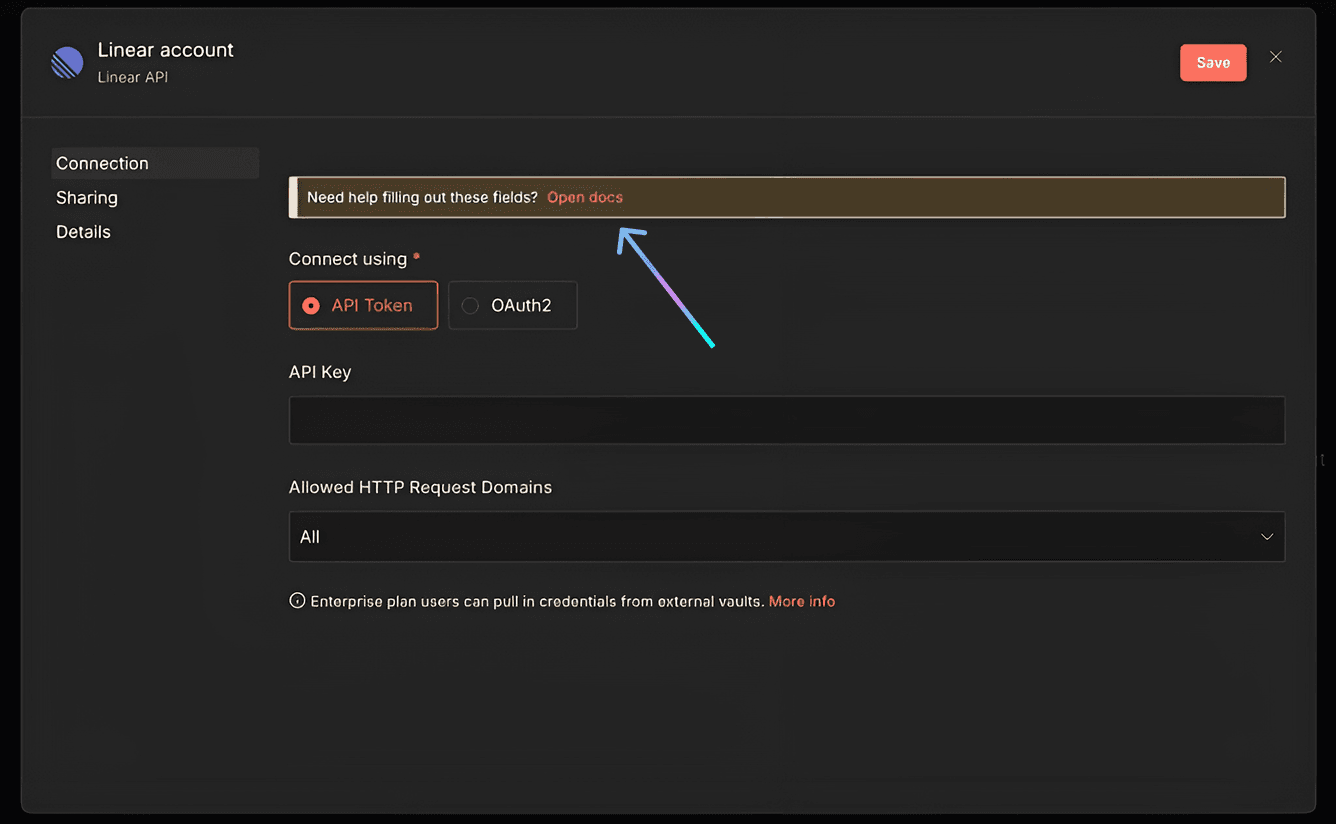
At the top, you’ll see the message “Need help filling out these fields? Open docs”. You can click Open docs to view instructions on how to obtain the API key for the app you are connecting.
In the case of Linear:
Go to Settings > Security & Access
Press New API Key
Name it and click Create
Copy the key and paste it into the API field in n8n
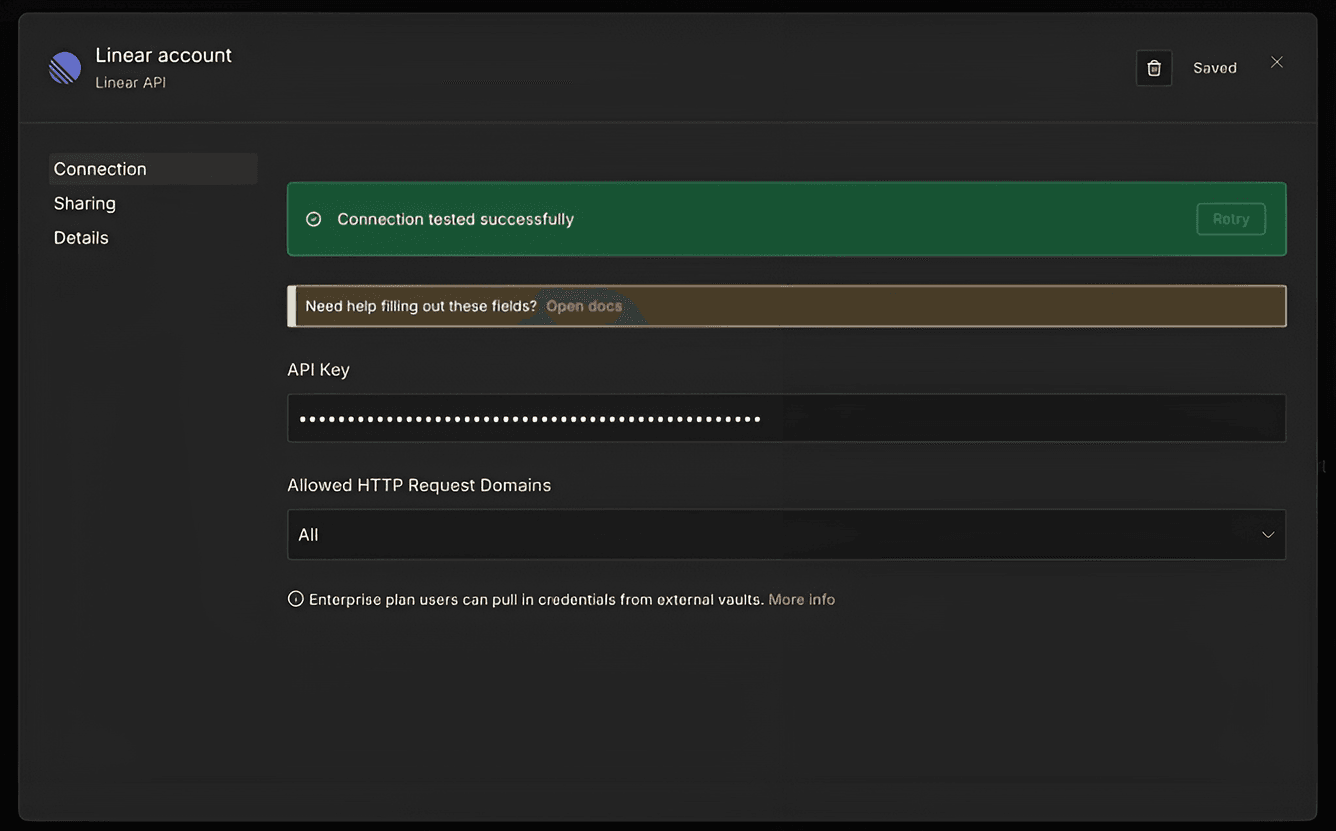
Click Save. You should see Connection tested successfully.
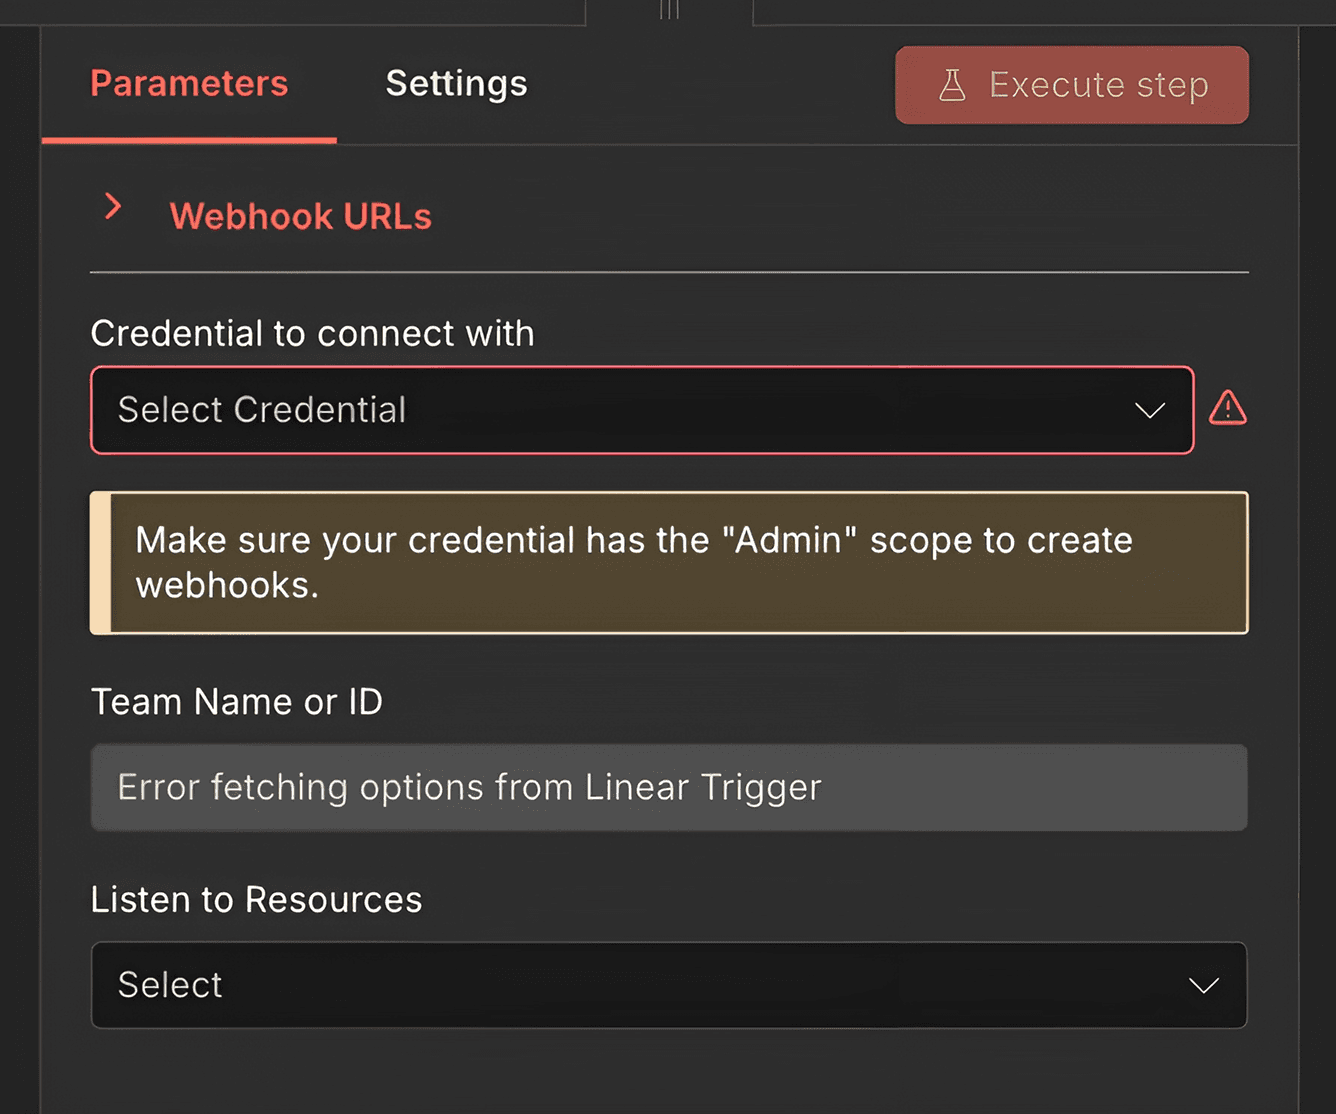
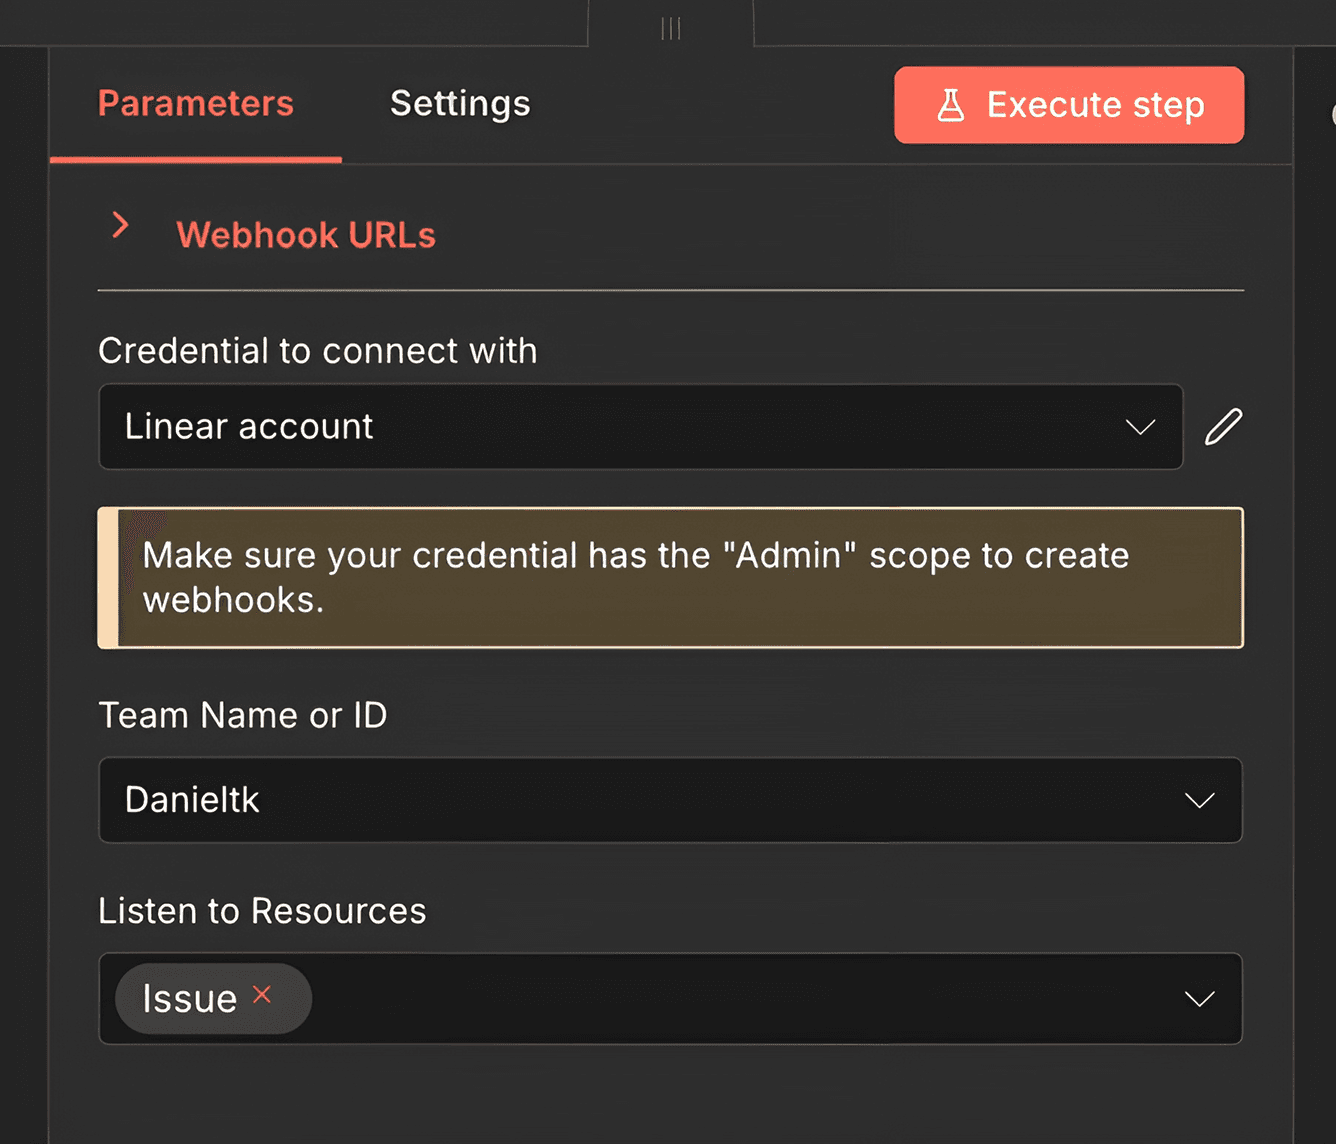
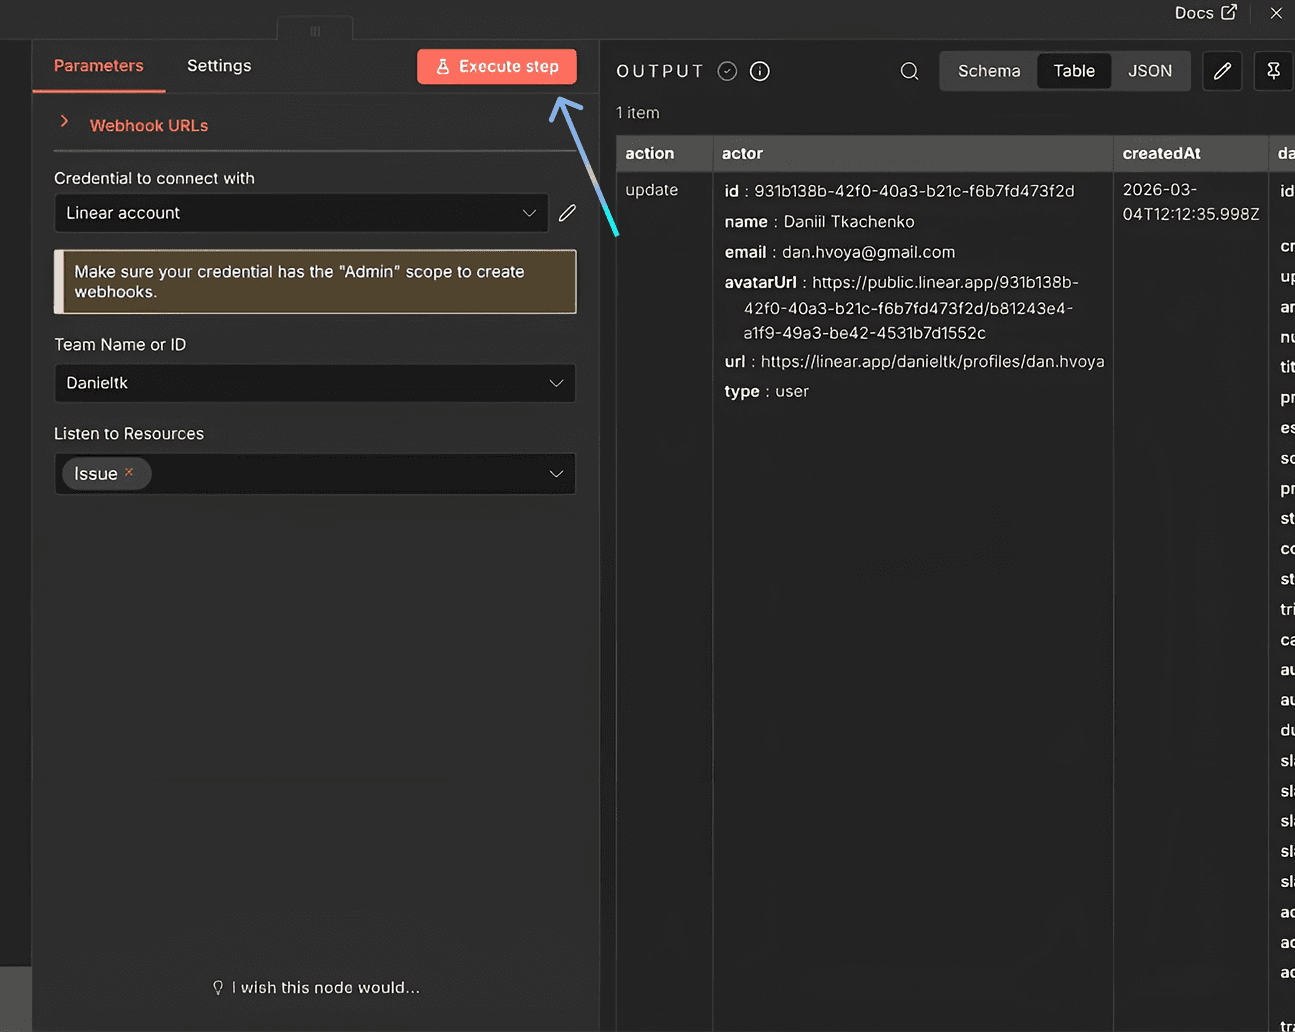
Press X (top right) to exit. Select your Team Name or ID (n8n will suggest available options). In Listen to Resources, choose Issue.
Press Execute Step, then go to Linear and create a test issue. Once done, you will see the result in n8n. The created issue will appear in the output panel on the right.
Press X (top right) or Esc to exit.
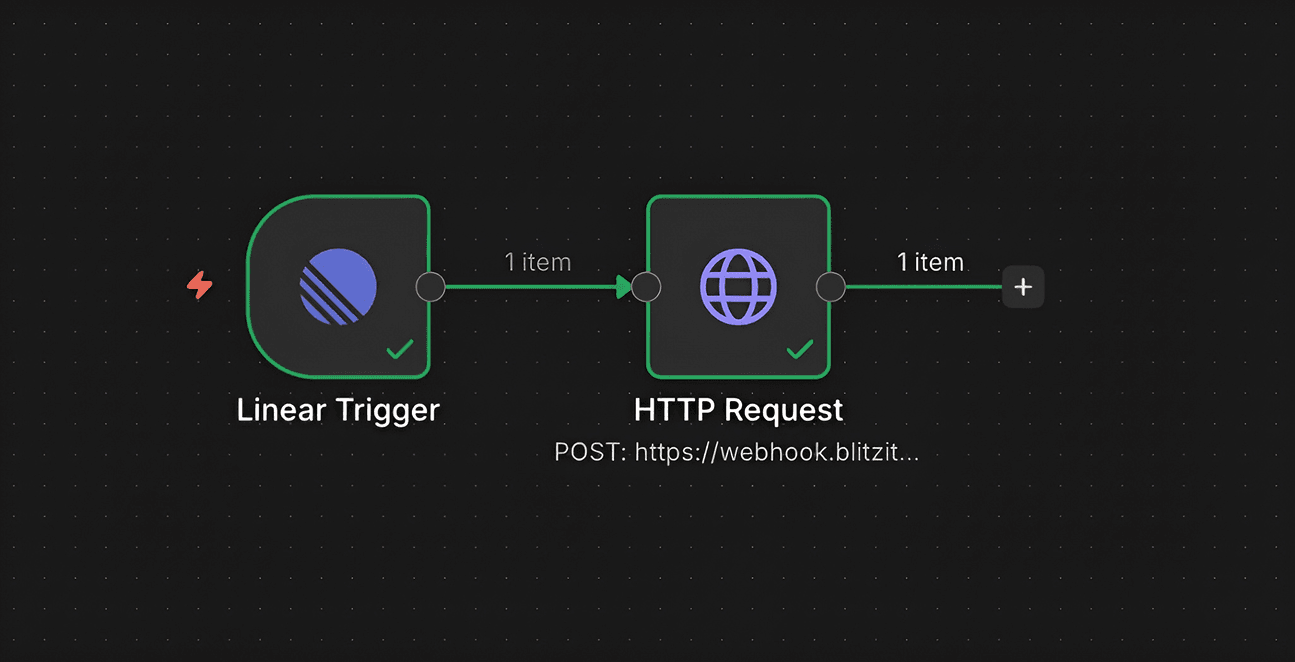
Configuring the HTTP Request Action
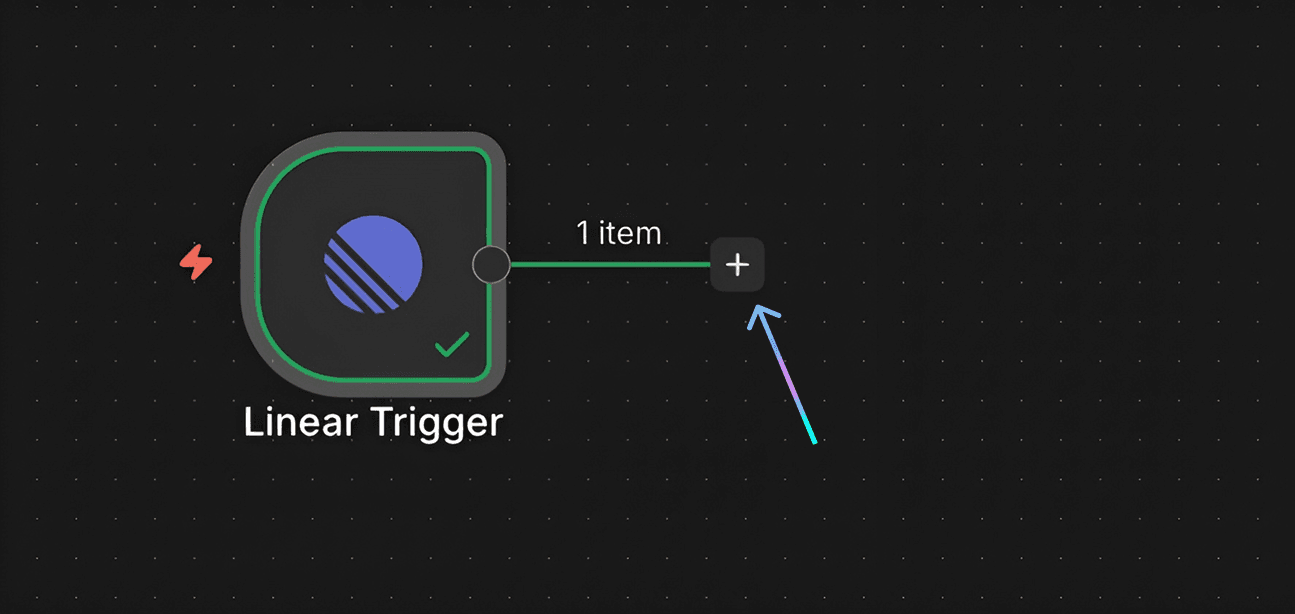
Press the + button next to the Linear trigger to create the next action. Search for HTTP Request and select it.
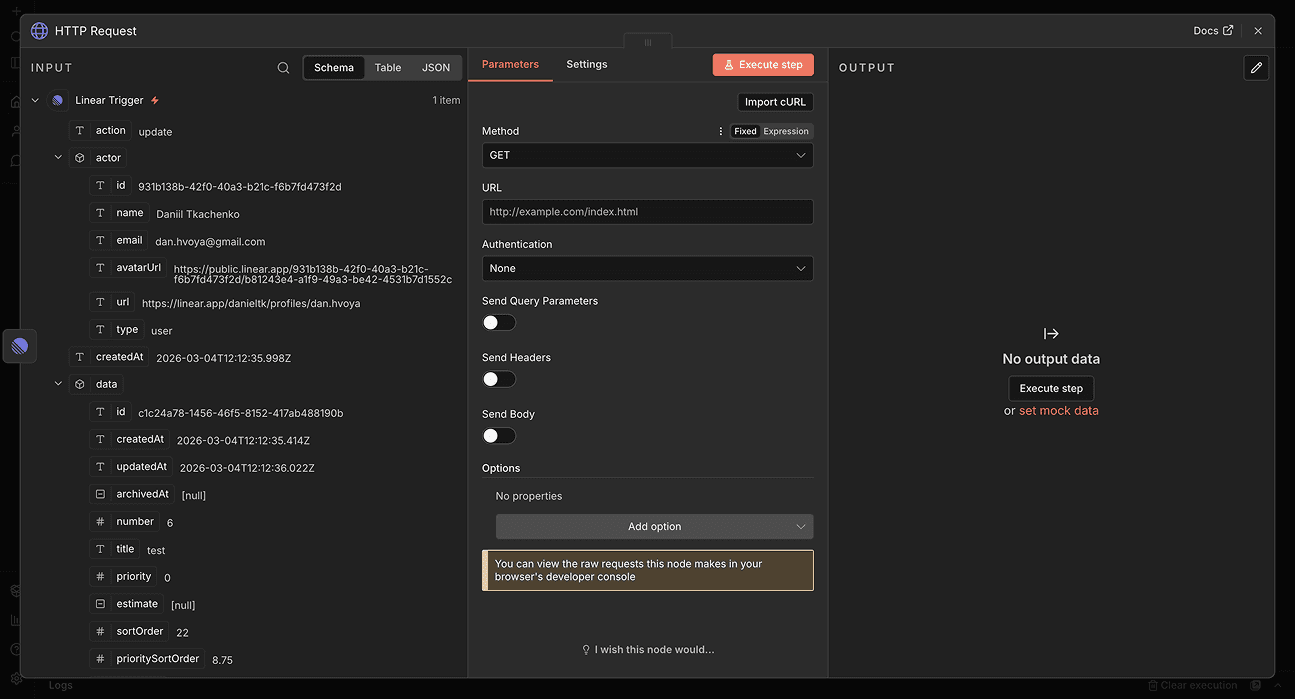
In the configuration panel:
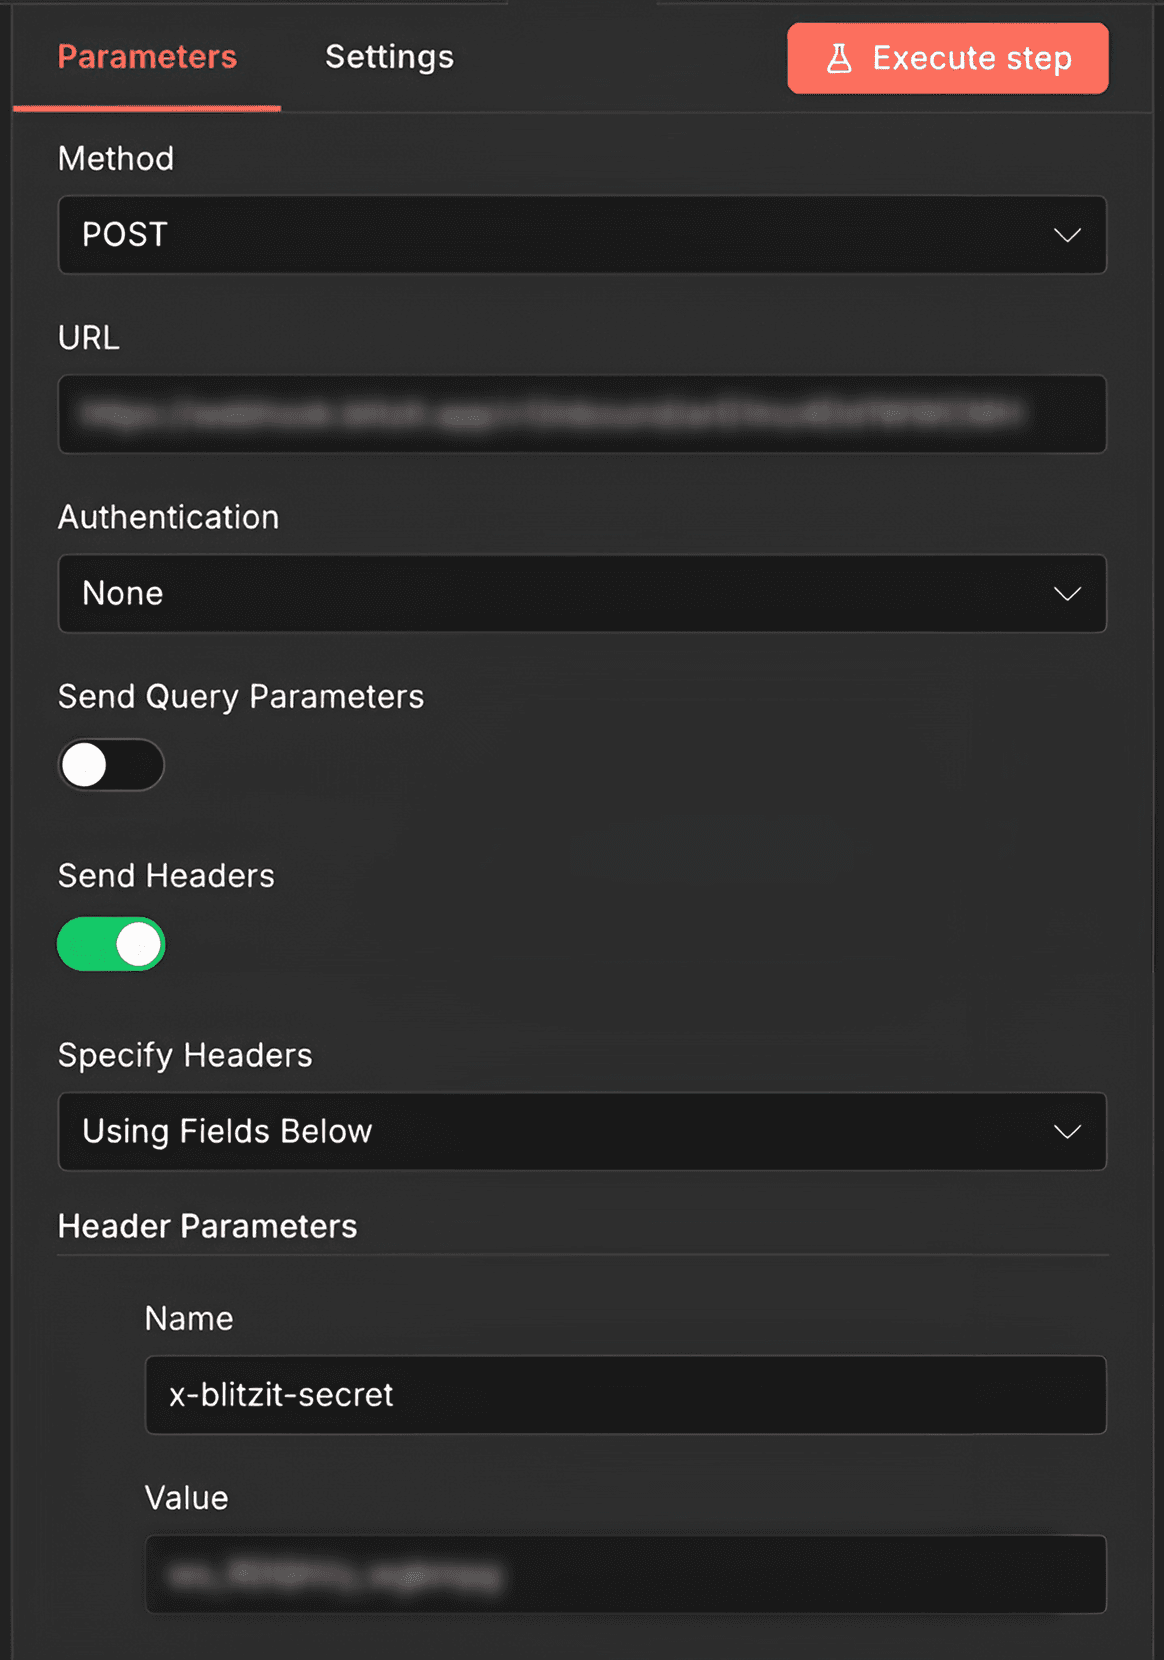
In the Method field, choose POST.
In the URL field, insert the Webhook URL from your Blitzit list.
Enable Send Headers by toggling it on. A new section will appear:
In the Name field, enter
x-blitzit-secretIn the Value field, paste your Blitzit Signing Secret
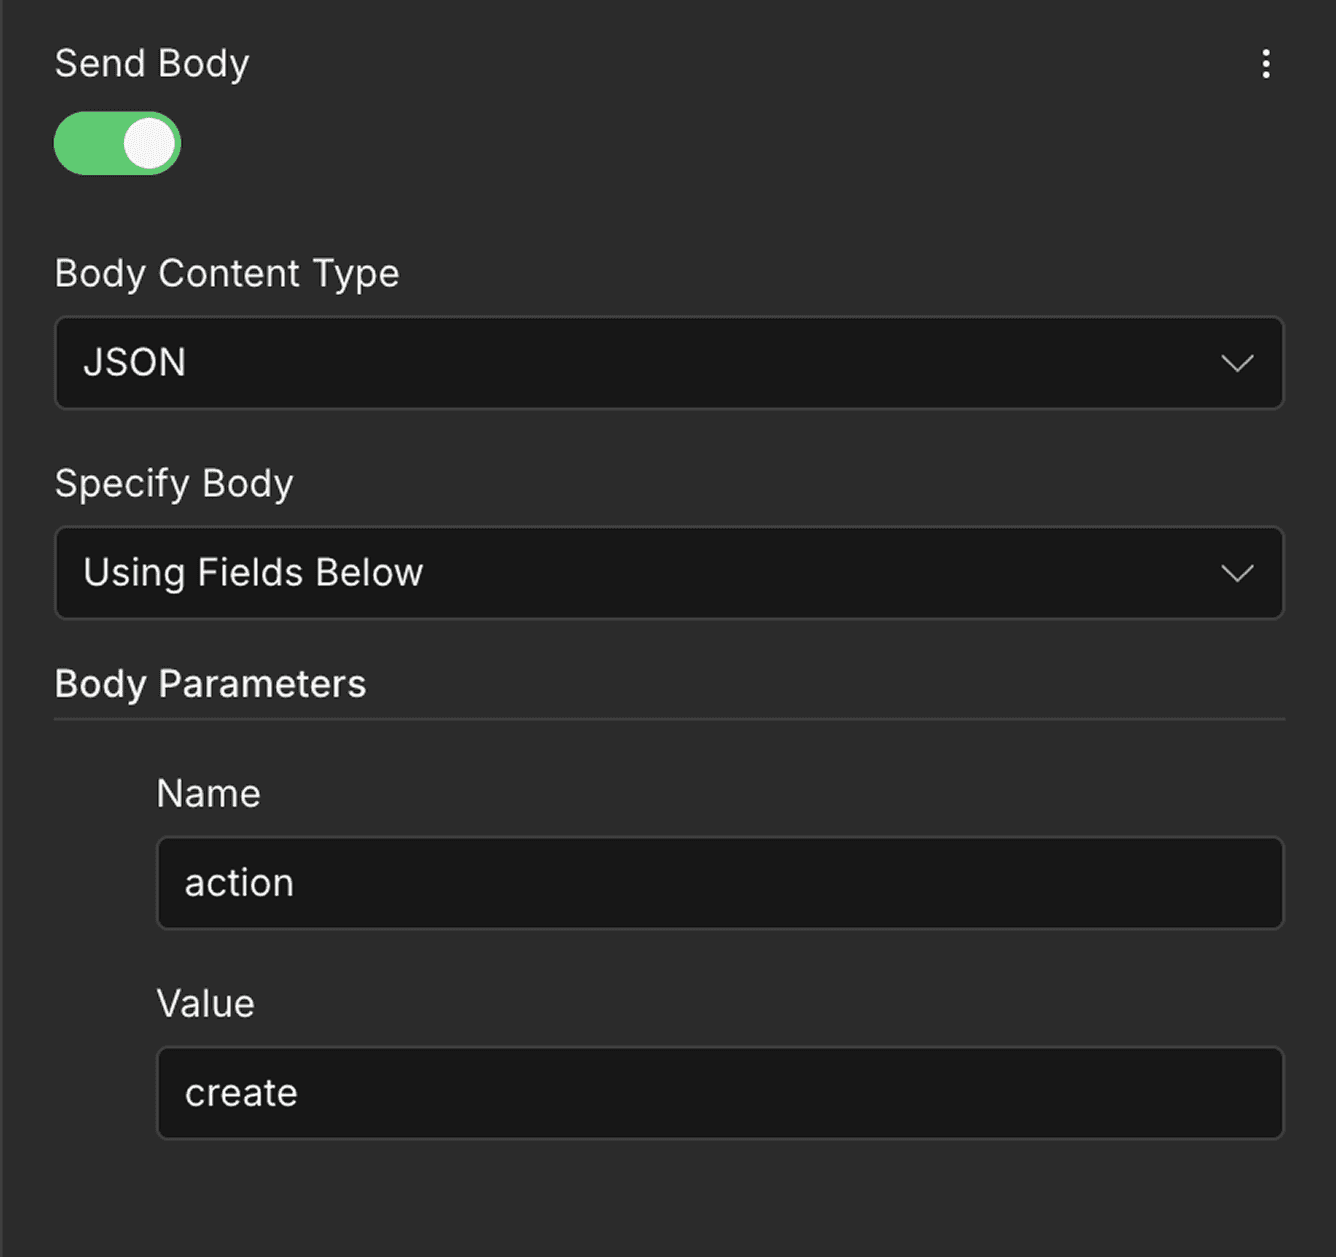
4. Enable Send Body by toggling it on:
Set Body Content Type to JSON
In Specify Body, choose Using Fields Below
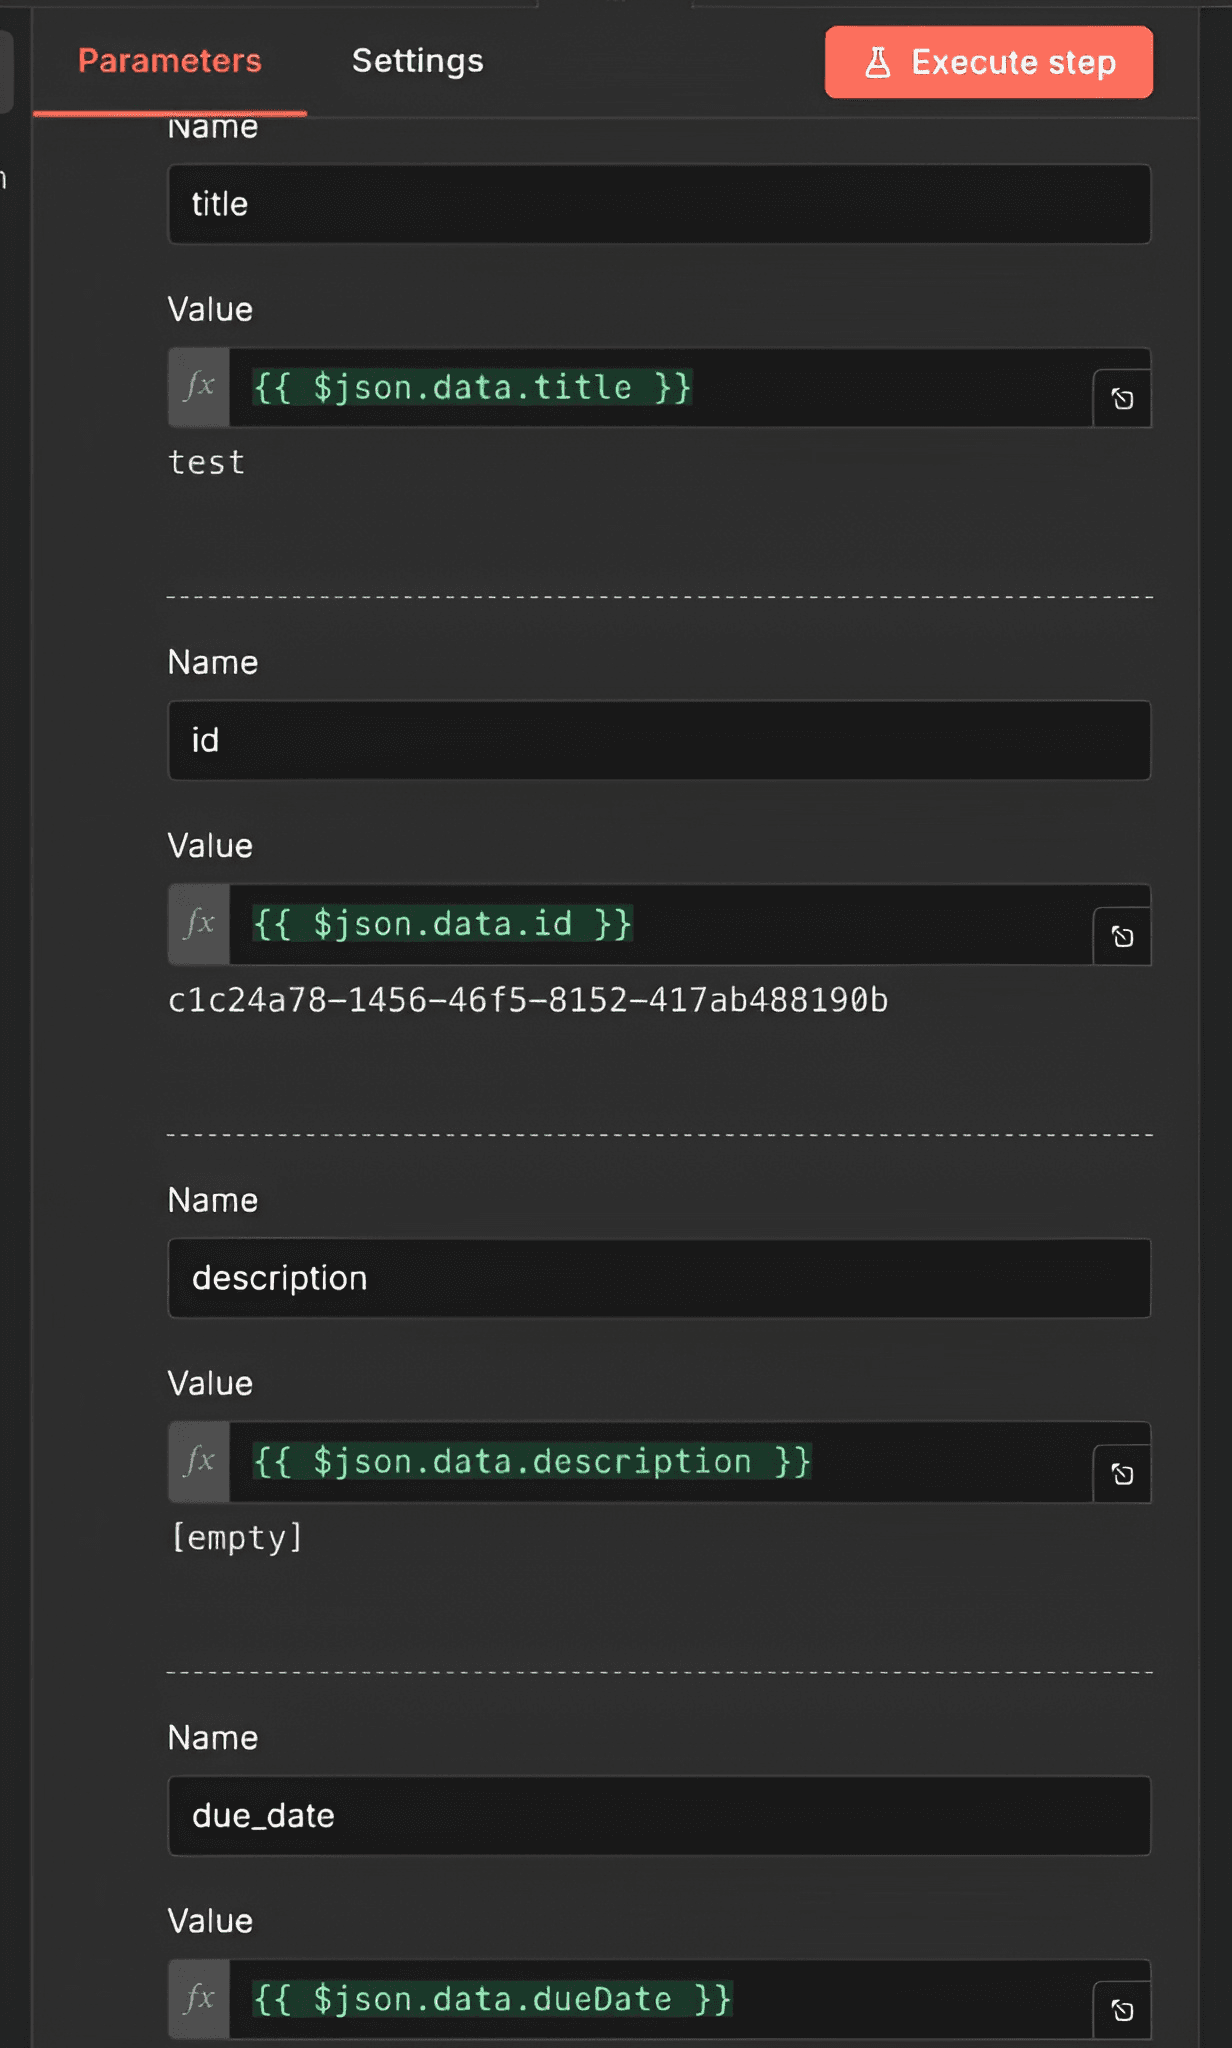
Add the required parameters:
In the Name field, enter
actionIn the Value field, enter
create
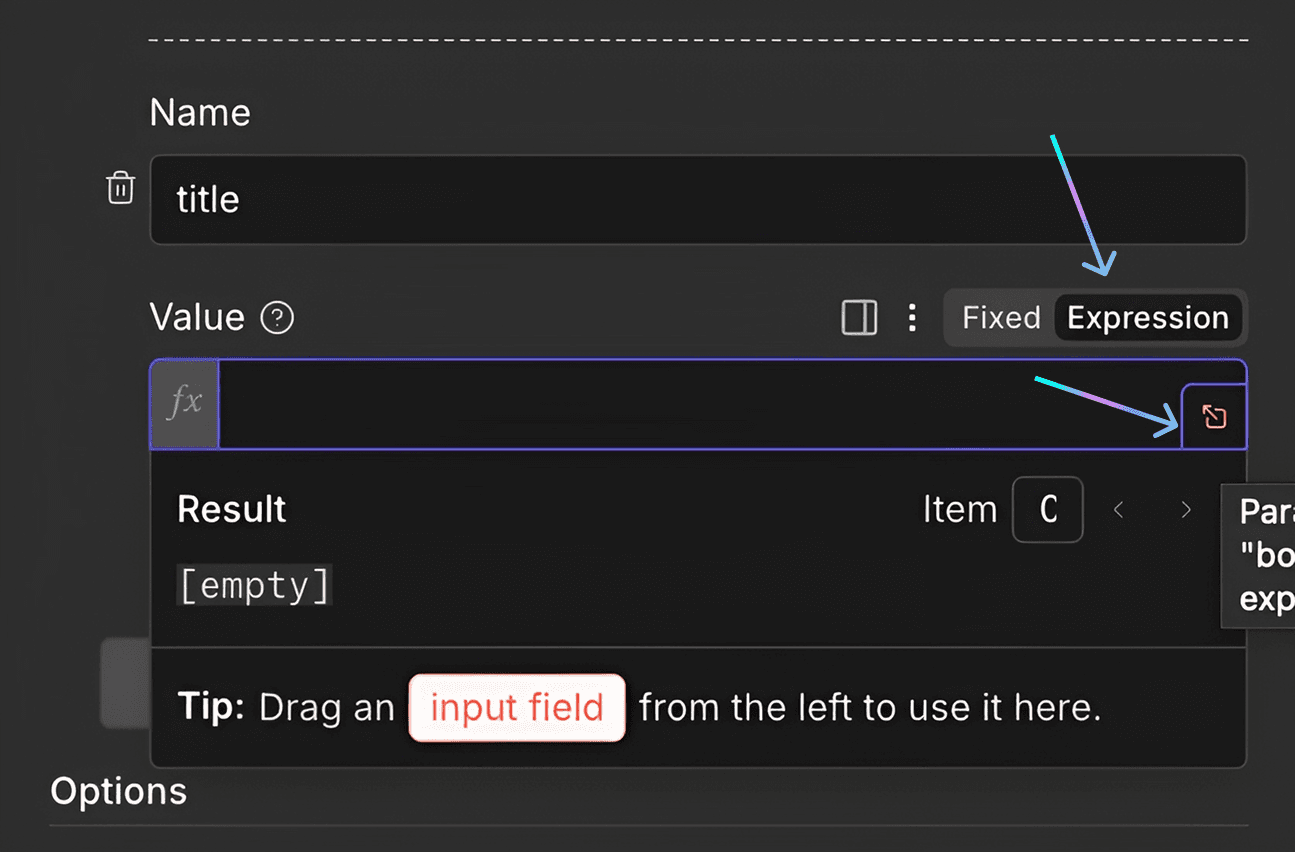
Add additional fields by clicking Add Parameter. For each field:
In the Value field, switch from Fixed to Expression
Click the small square-with-arrow icon to open the data selector
Select the appropriate value from the list (you can drag it into the field)
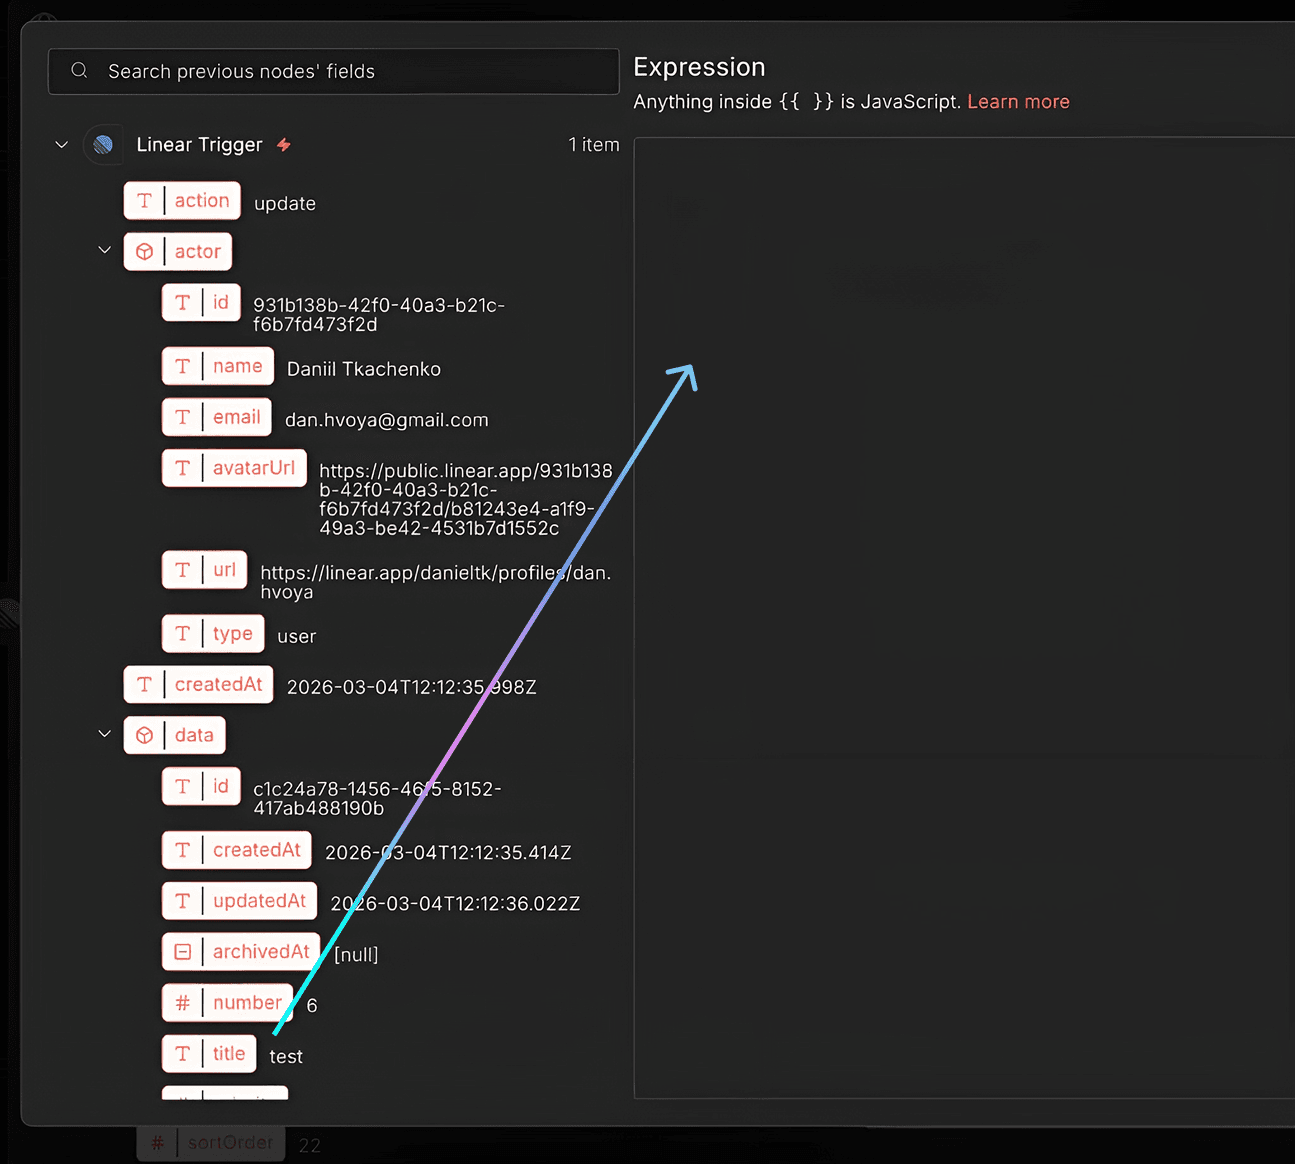
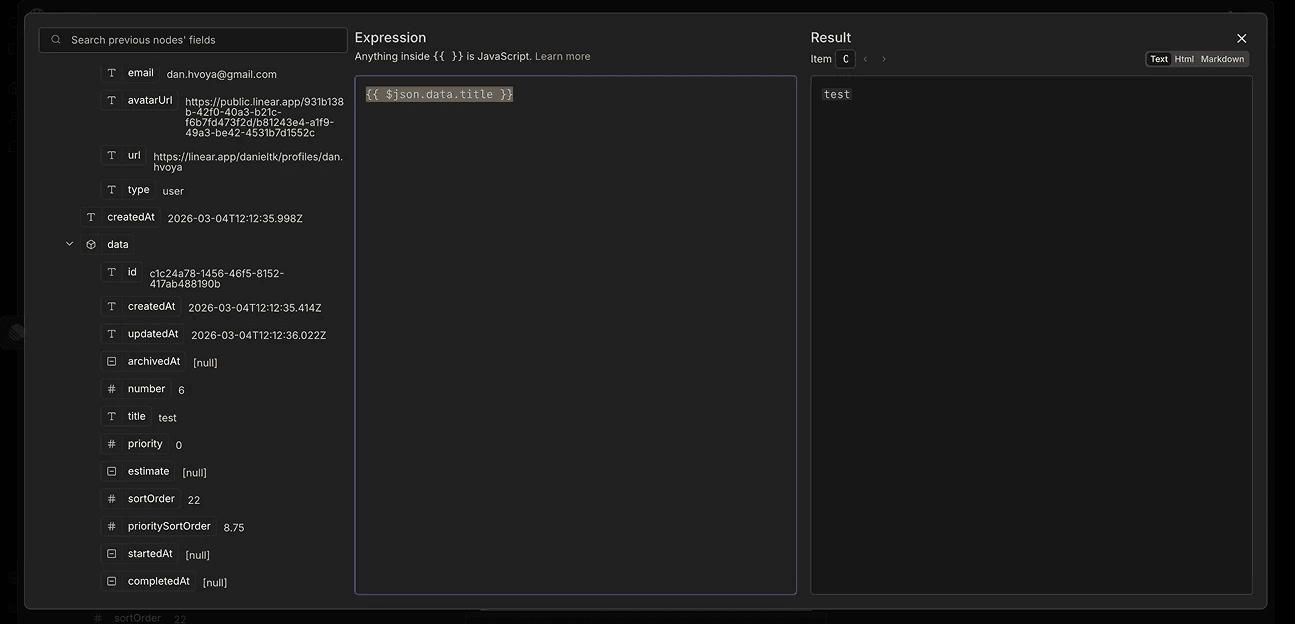
Create the following Name–Value pairs:
title→ titleid→ iddescription→ descriptiondue_date→ dueDate
Note: Optional fields such as
urlorestimatecan also be included. For a complete list of supported fields, open the Guide tab inside the relevant Blitzit list.
Testing the Setup
Exit the configuration menu.
Press Execute Workflow.
Create a new test issue in Linear.
If everything is configured correctly:
n8n will show a successful execution
A new task will appear in Blitzit
Similar to this, you can connect webhooks with other apps.
Note: This integration is one-way only. We’re working on two-way support and appreciate your feedback.
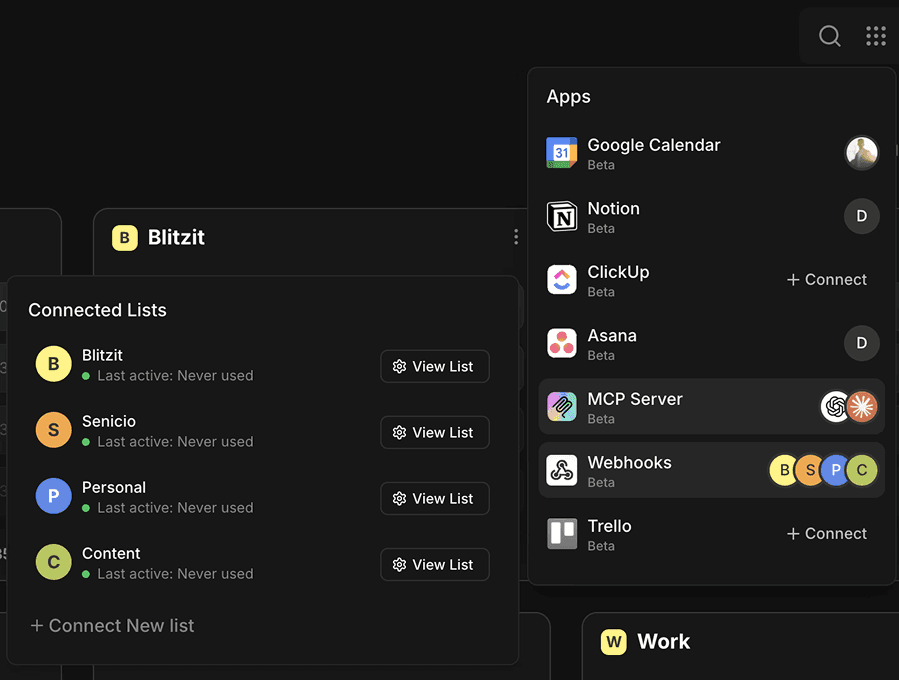
Using the Integration
From the Home screen in Blitzit, open the Integrations dashboard (⋮⋮⋮ > Webhooks) to:
View all connected lists
Click View List to open any list
Click Connect New List to add more
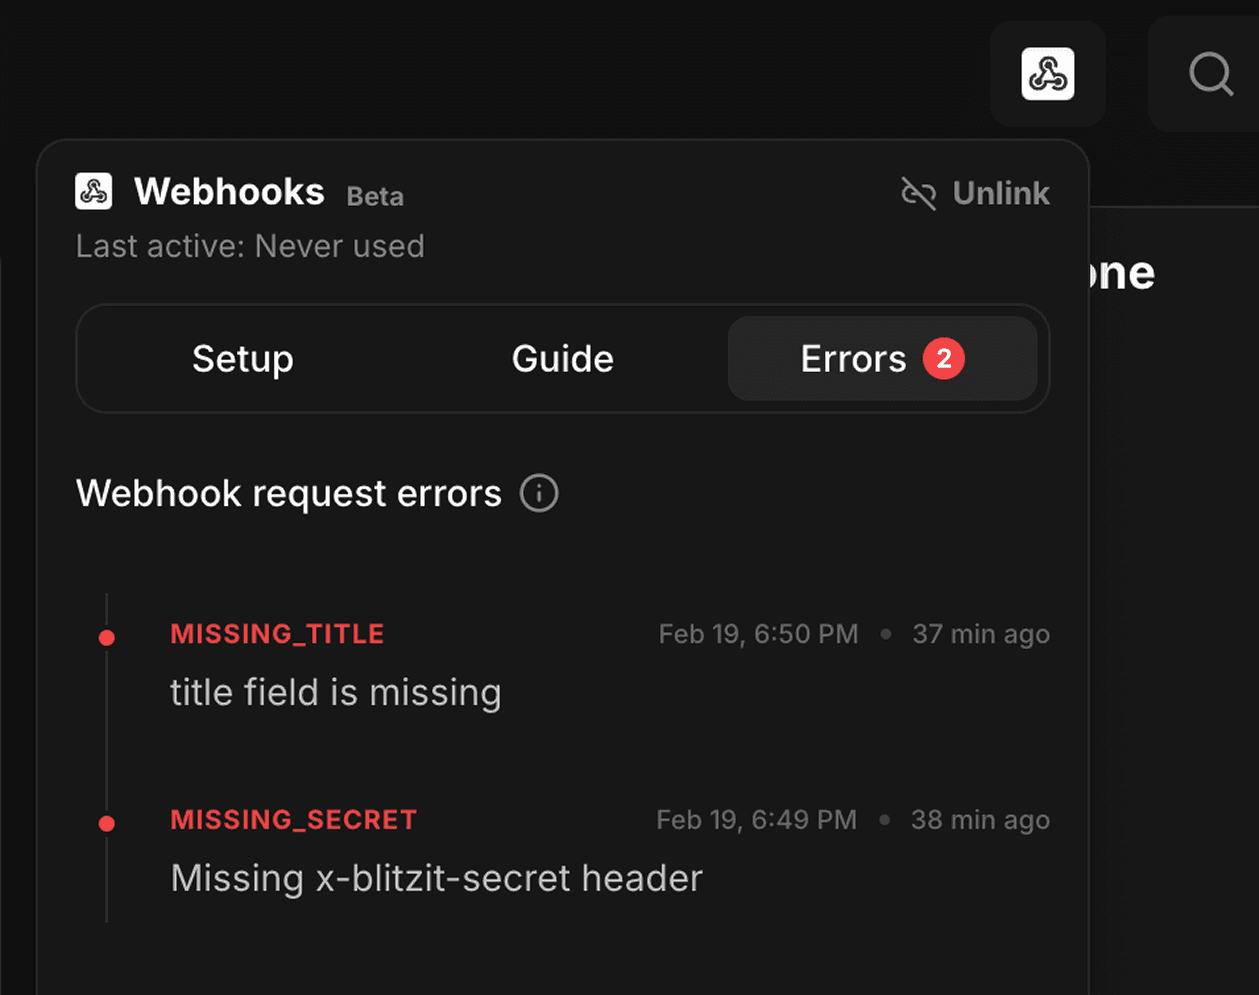
In any connected list, clicking the Webhooks icon (top right) opens settings with:
Toggle to enable or disable the webhook
Unlink button to disconnect the list completely
Guide tab showing payload field references
Errors tab showing issues (if any)