Integrating Make with Blitzit
This integration lets you send tasks from other apps to Blitzit automatically using webhooks via Make.
Setting Up the Integration in Blitzit
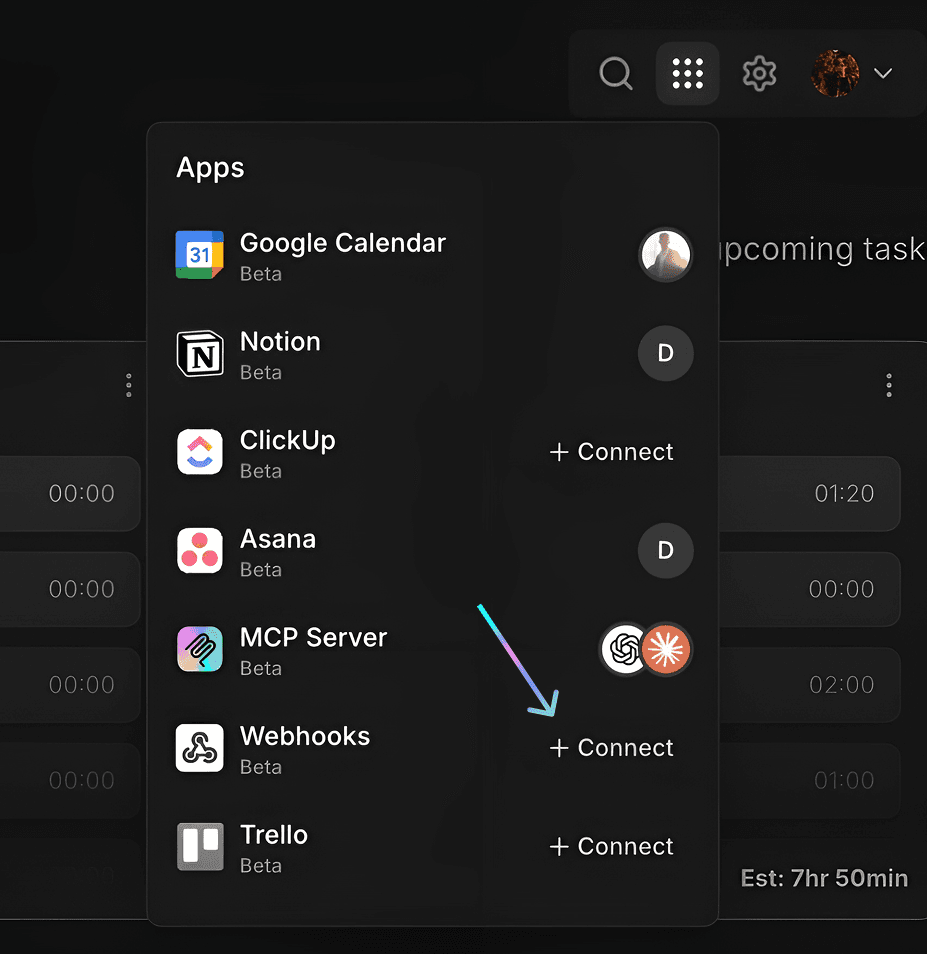
Go to Integrations (⋮⋮⋮ button on the top right), then select Webhooks.
Select the lists you want to connect.
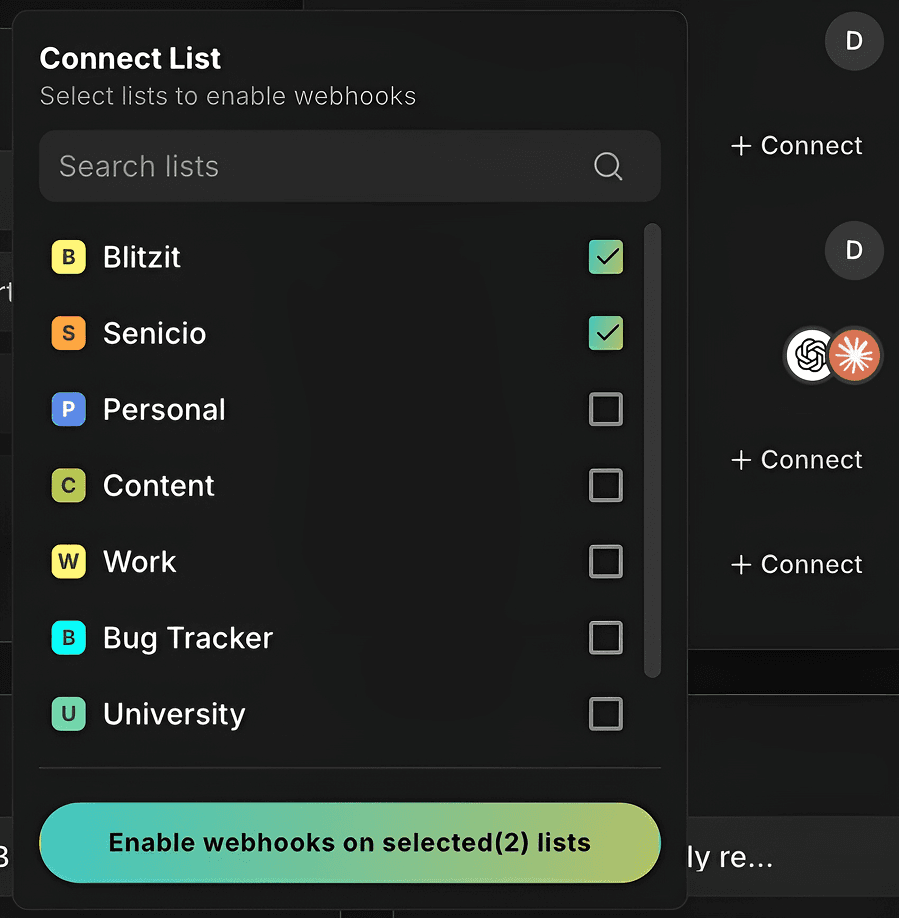
Click Enable webhooks on selected list(s) to confirm.
Open any connected list and click the Webhooks icon (top right) to view settings.
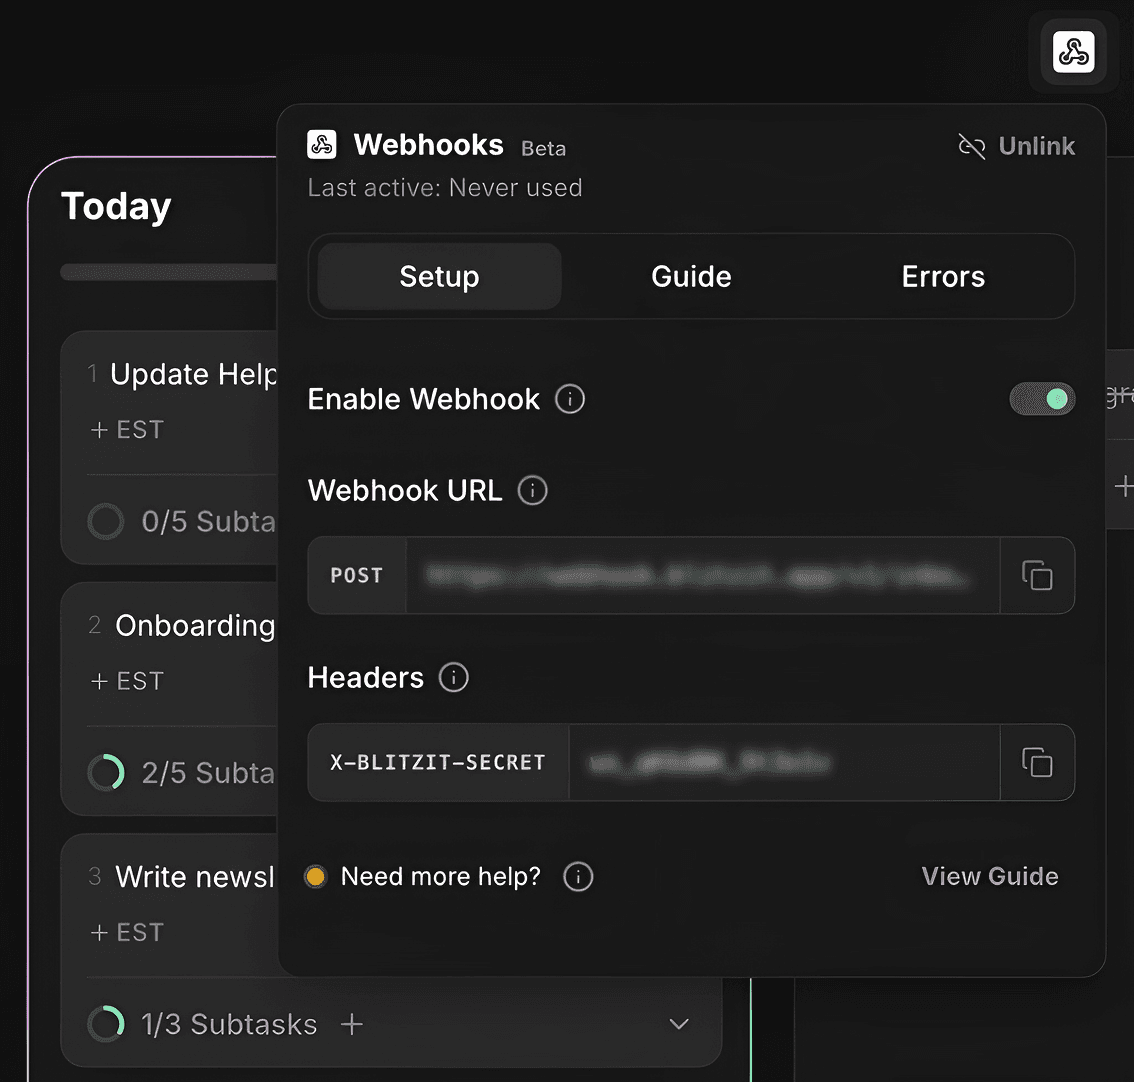
Copy the Webhook URL and Header with Signing Secret (blurred on screenshot). You’ll need these for Make.
Note: Each Blitzit list has its own unique Webhook URL and Signing Secret.
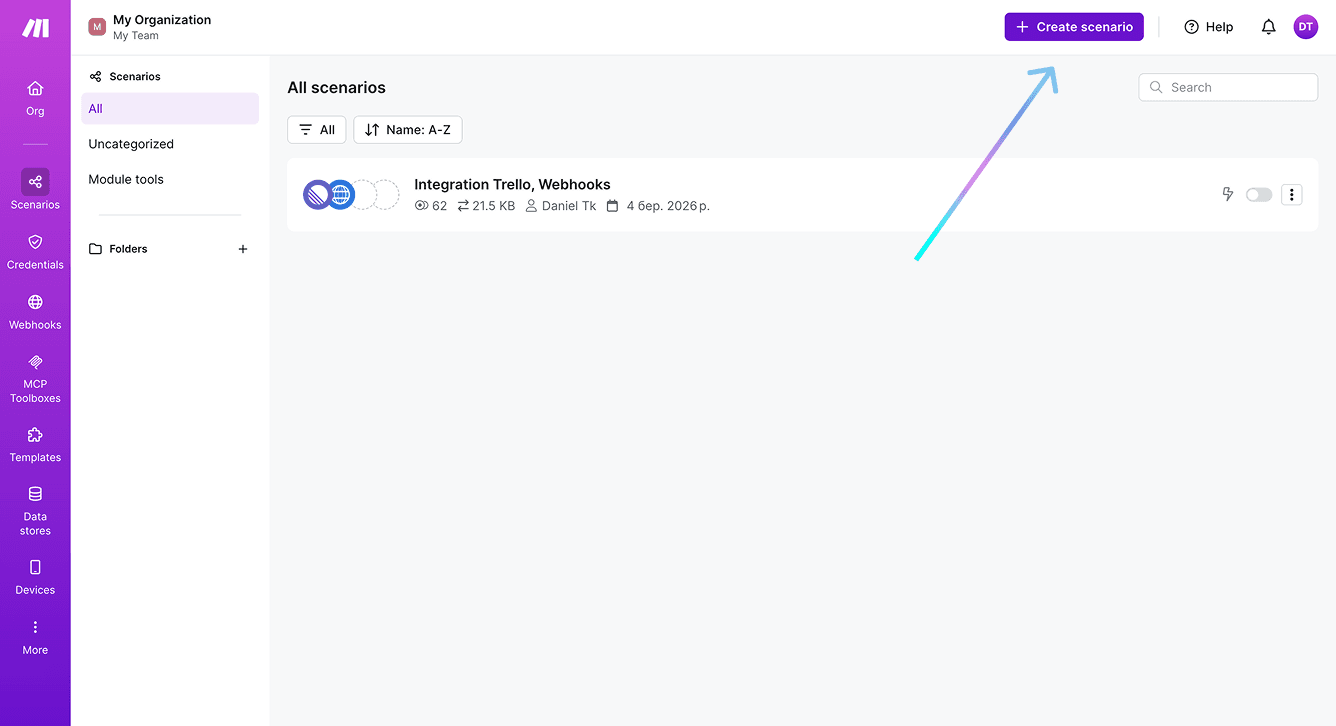
Creating the Scenario in Make
Press Create Scenario.
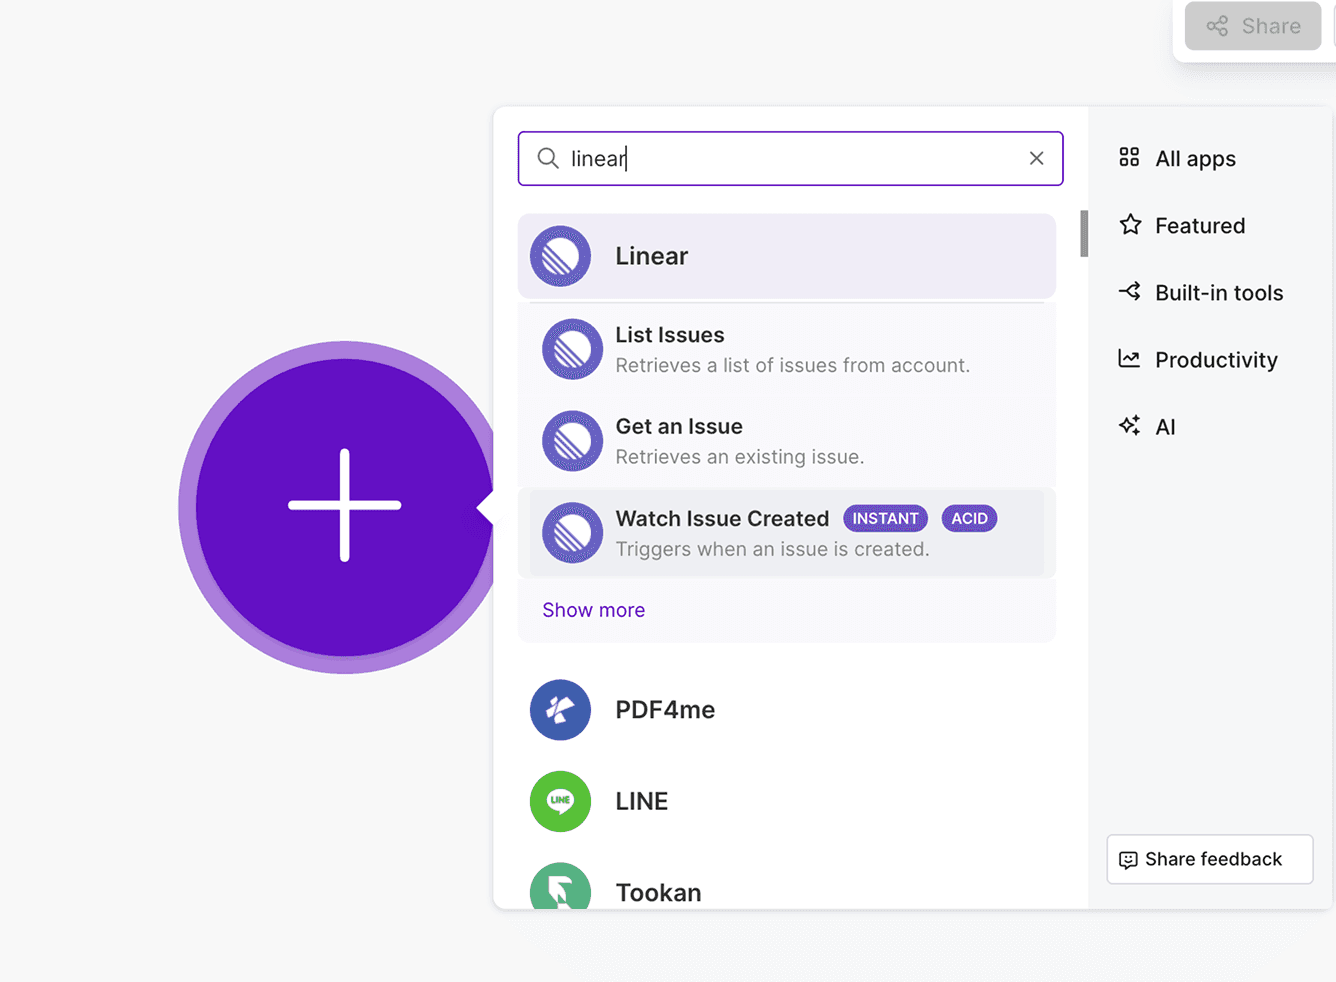
Click the + button in the centre to create the trigger.
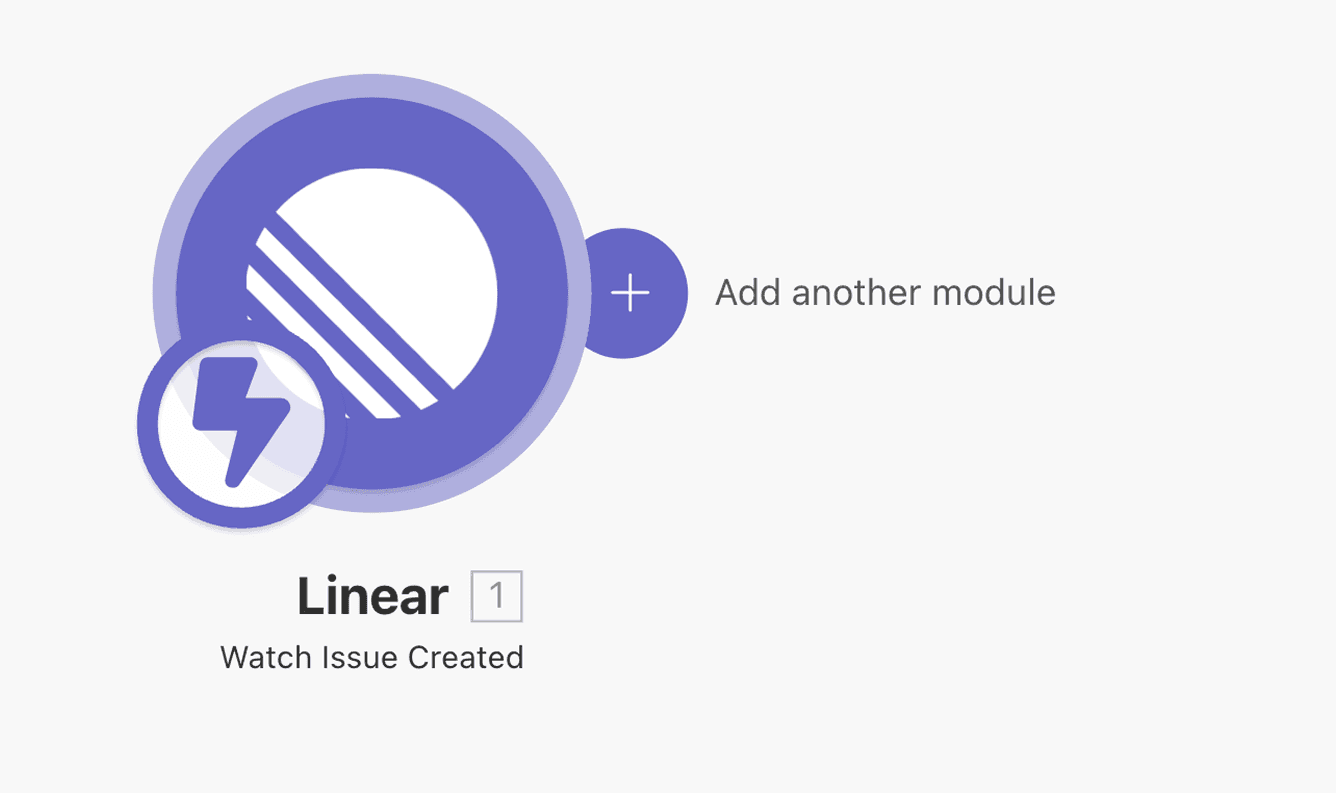
Search for the app you’d like to connect with Blitzit. For this guide, we’ll use Linear.
After selecting Linear, choose the trigger Watch Issue Created.
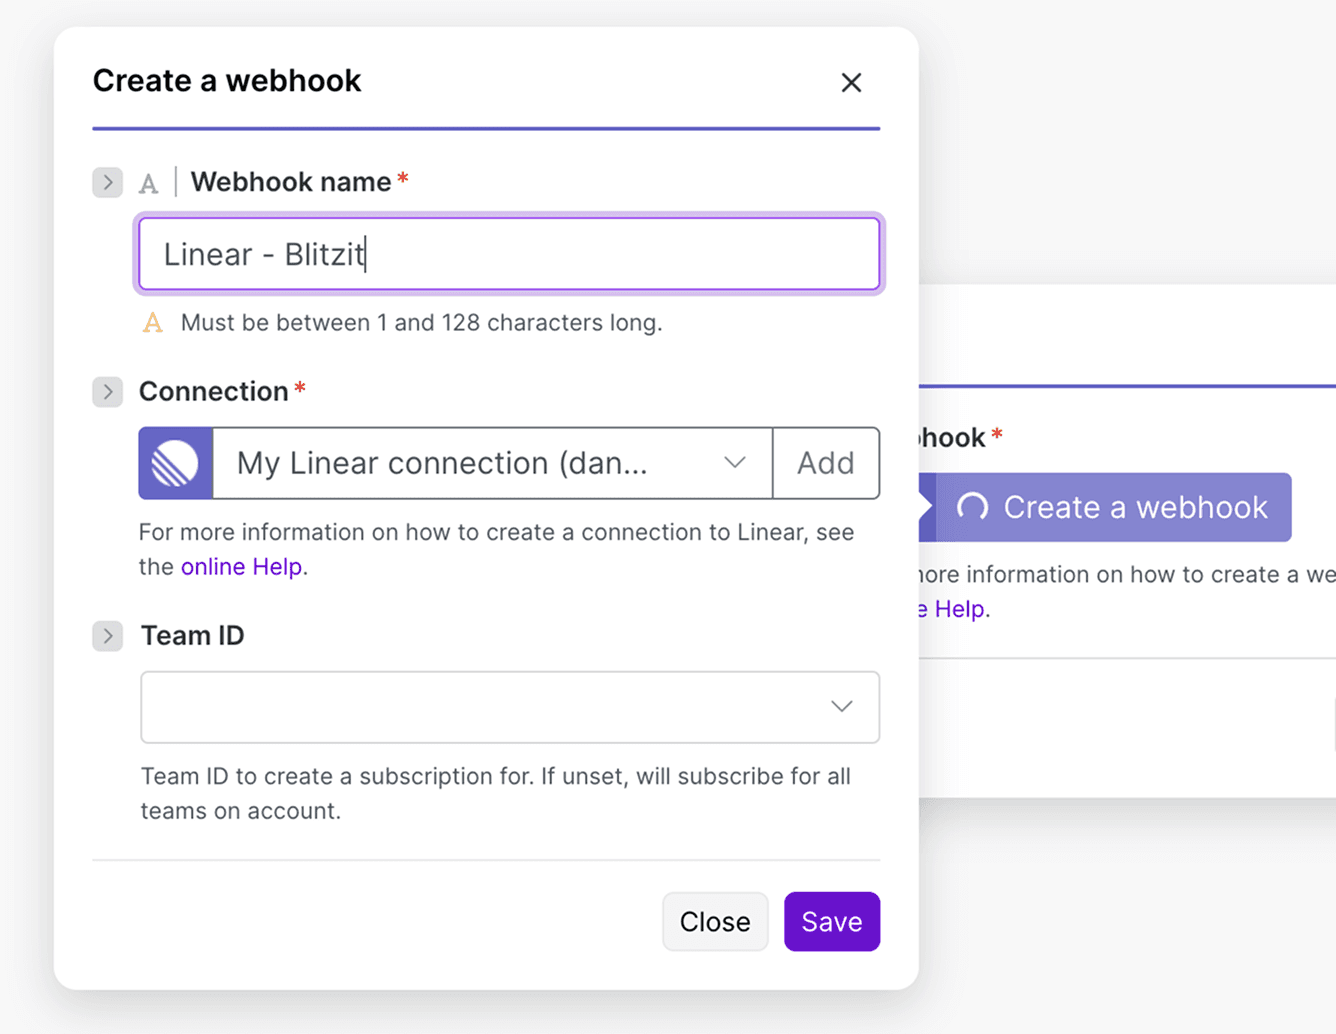
Press Create a webhook:
Name it as you like
In the Connection field, connect your Linear account and grant access
Click Save
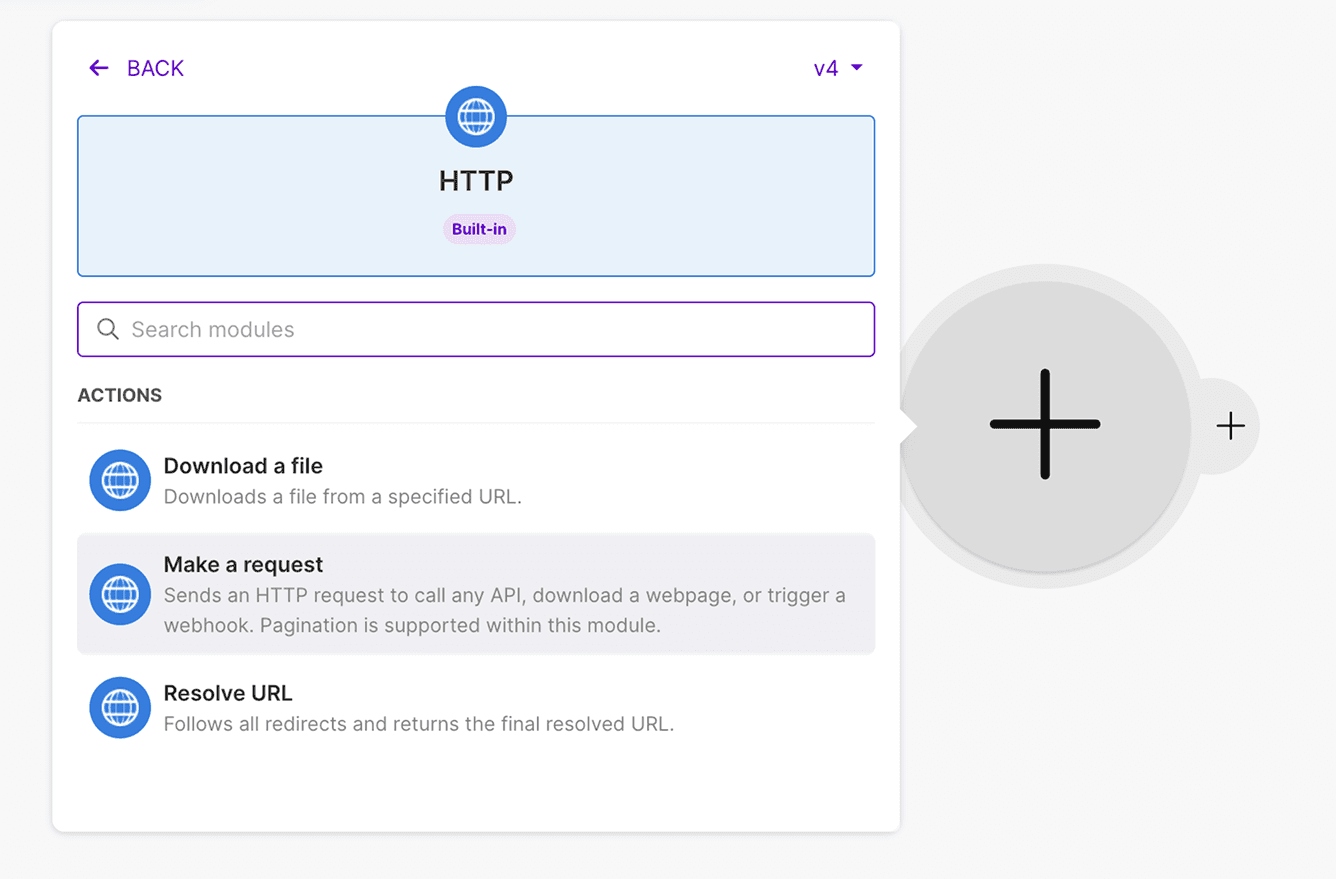
Once the Linear module is created, press the + button on its right side to add the next module.
Search for HTTP and select Make a request. You’ll see the configuration panel on the right.
Configuring the HTTP Request
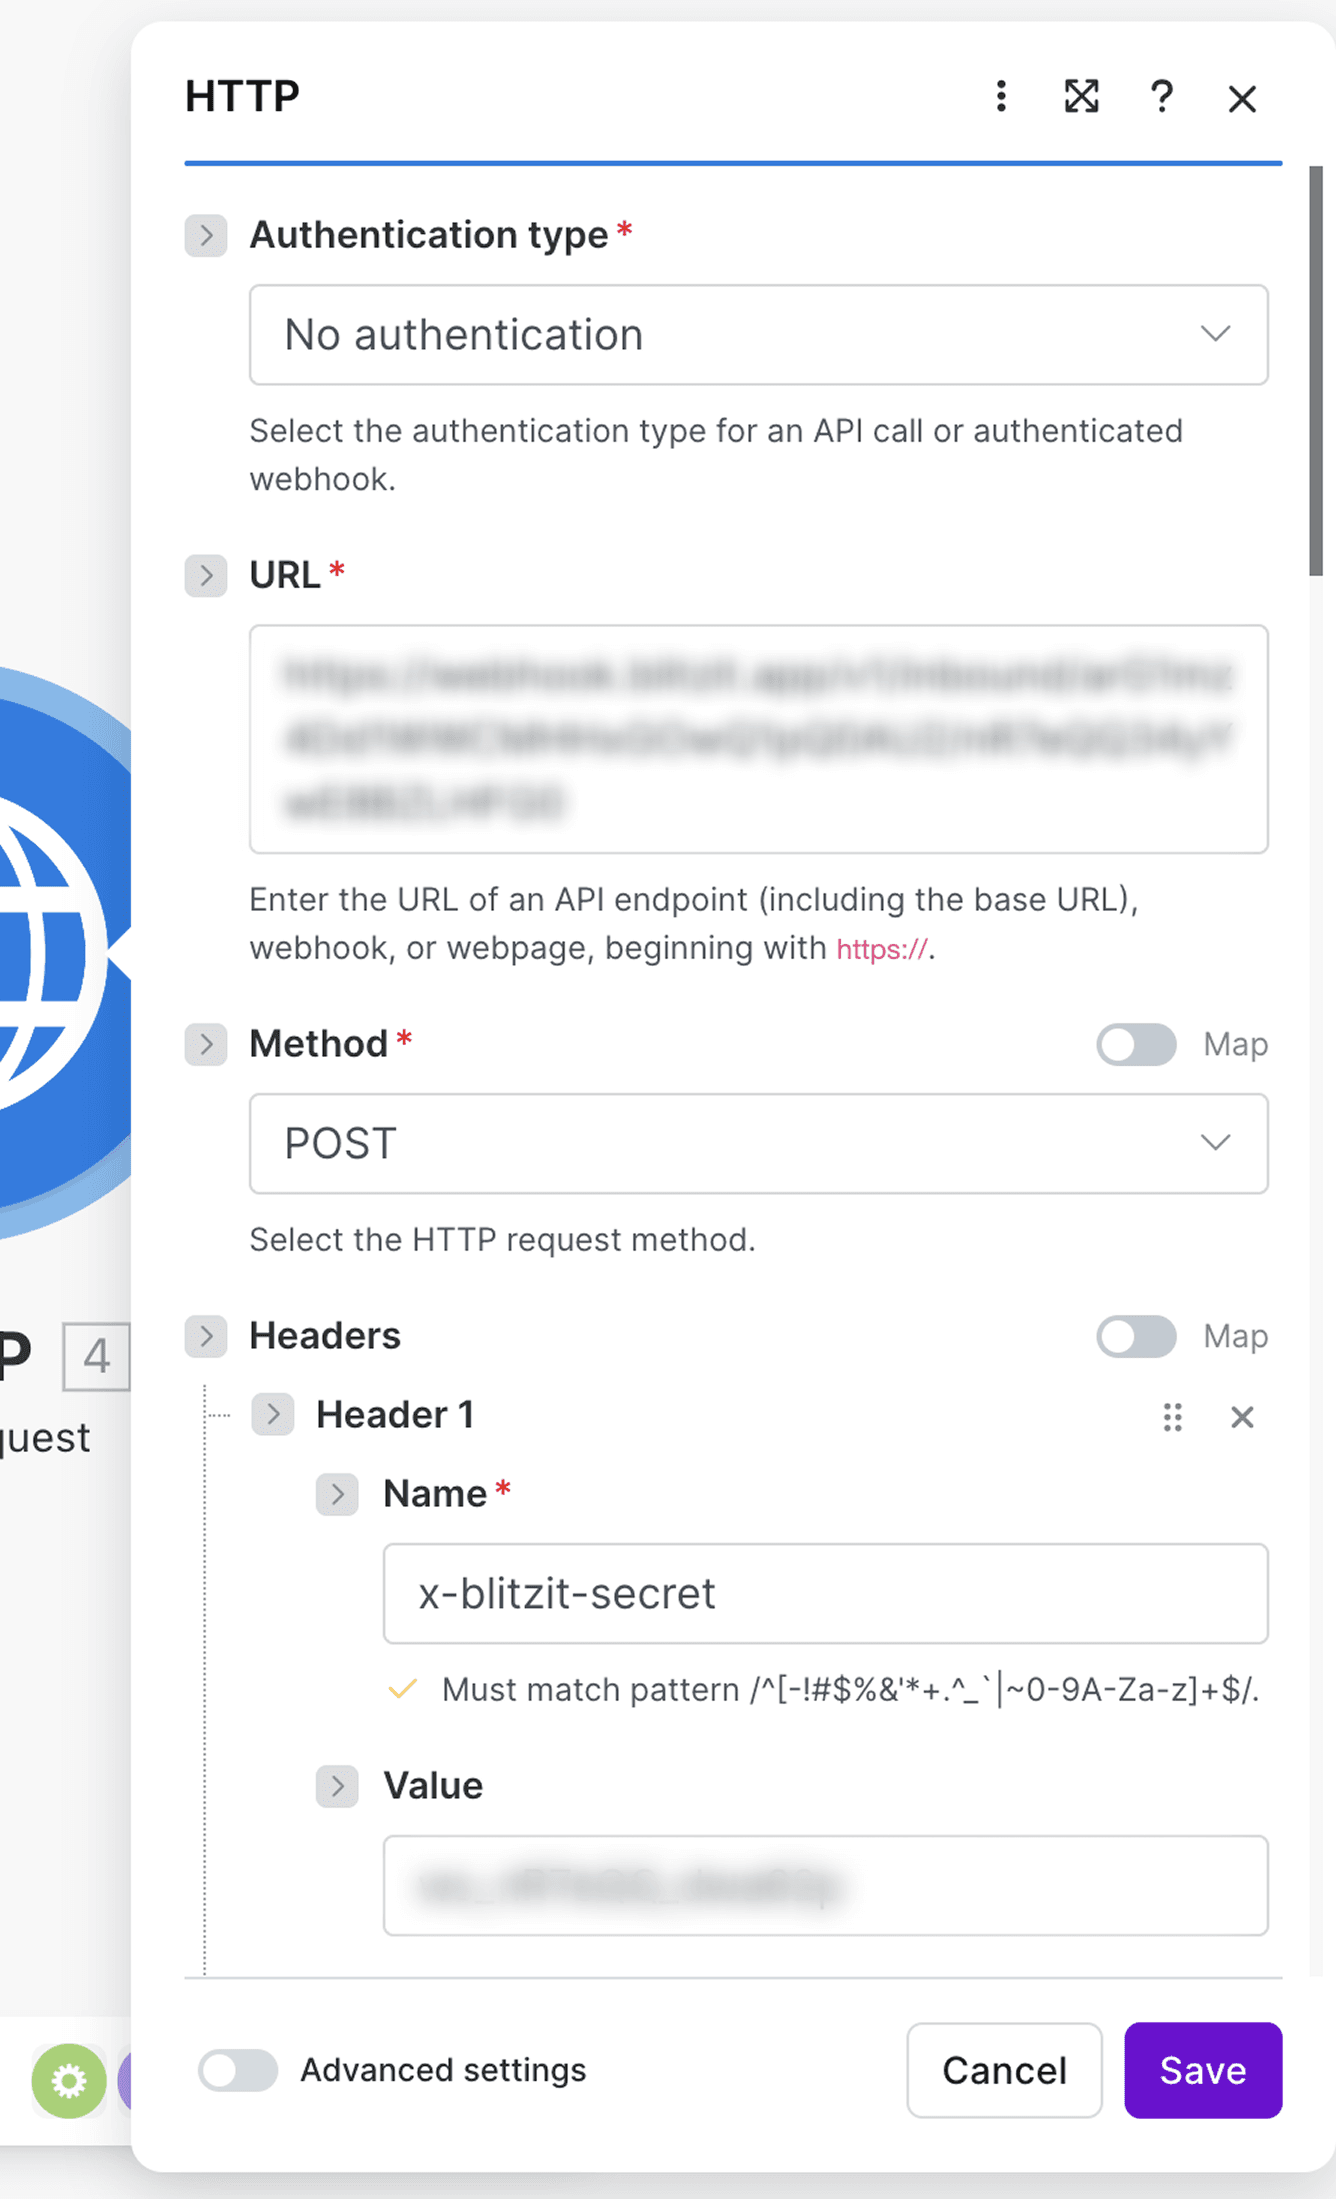
Set the following fields:
Authentication type: No authentication
URL: Paste your Blitzit Webhook URL
Method: POST
In Headers, add:
Name:
x-blitzit-secretValue: your Blitzit Signing Secret.
Skip Query parameters.
Set:
Body content type: application/json
Body input method: Data structure
Setting Up the Data Structure
In the Body structure field, click Add on the right.
Name the data structure.
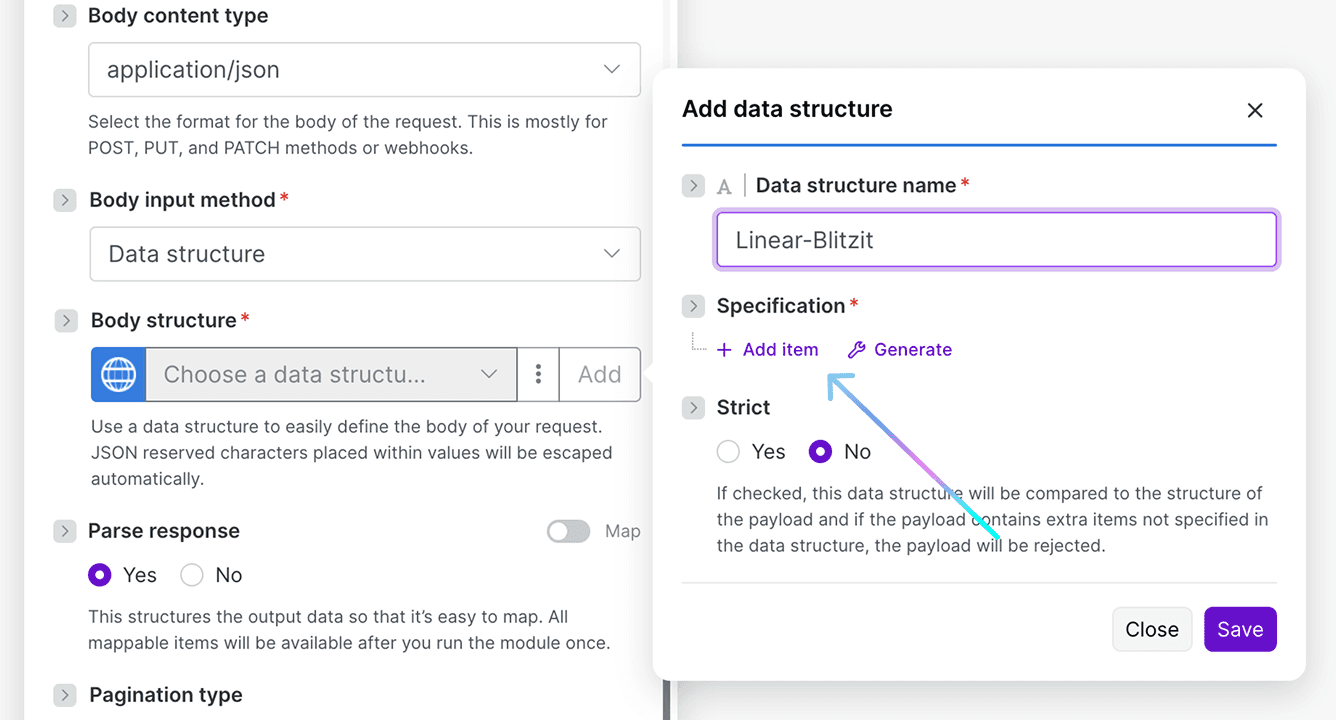
In the Specification field, click Add item and create the following items (leave other fields as default):
action
id
title
description
due_date
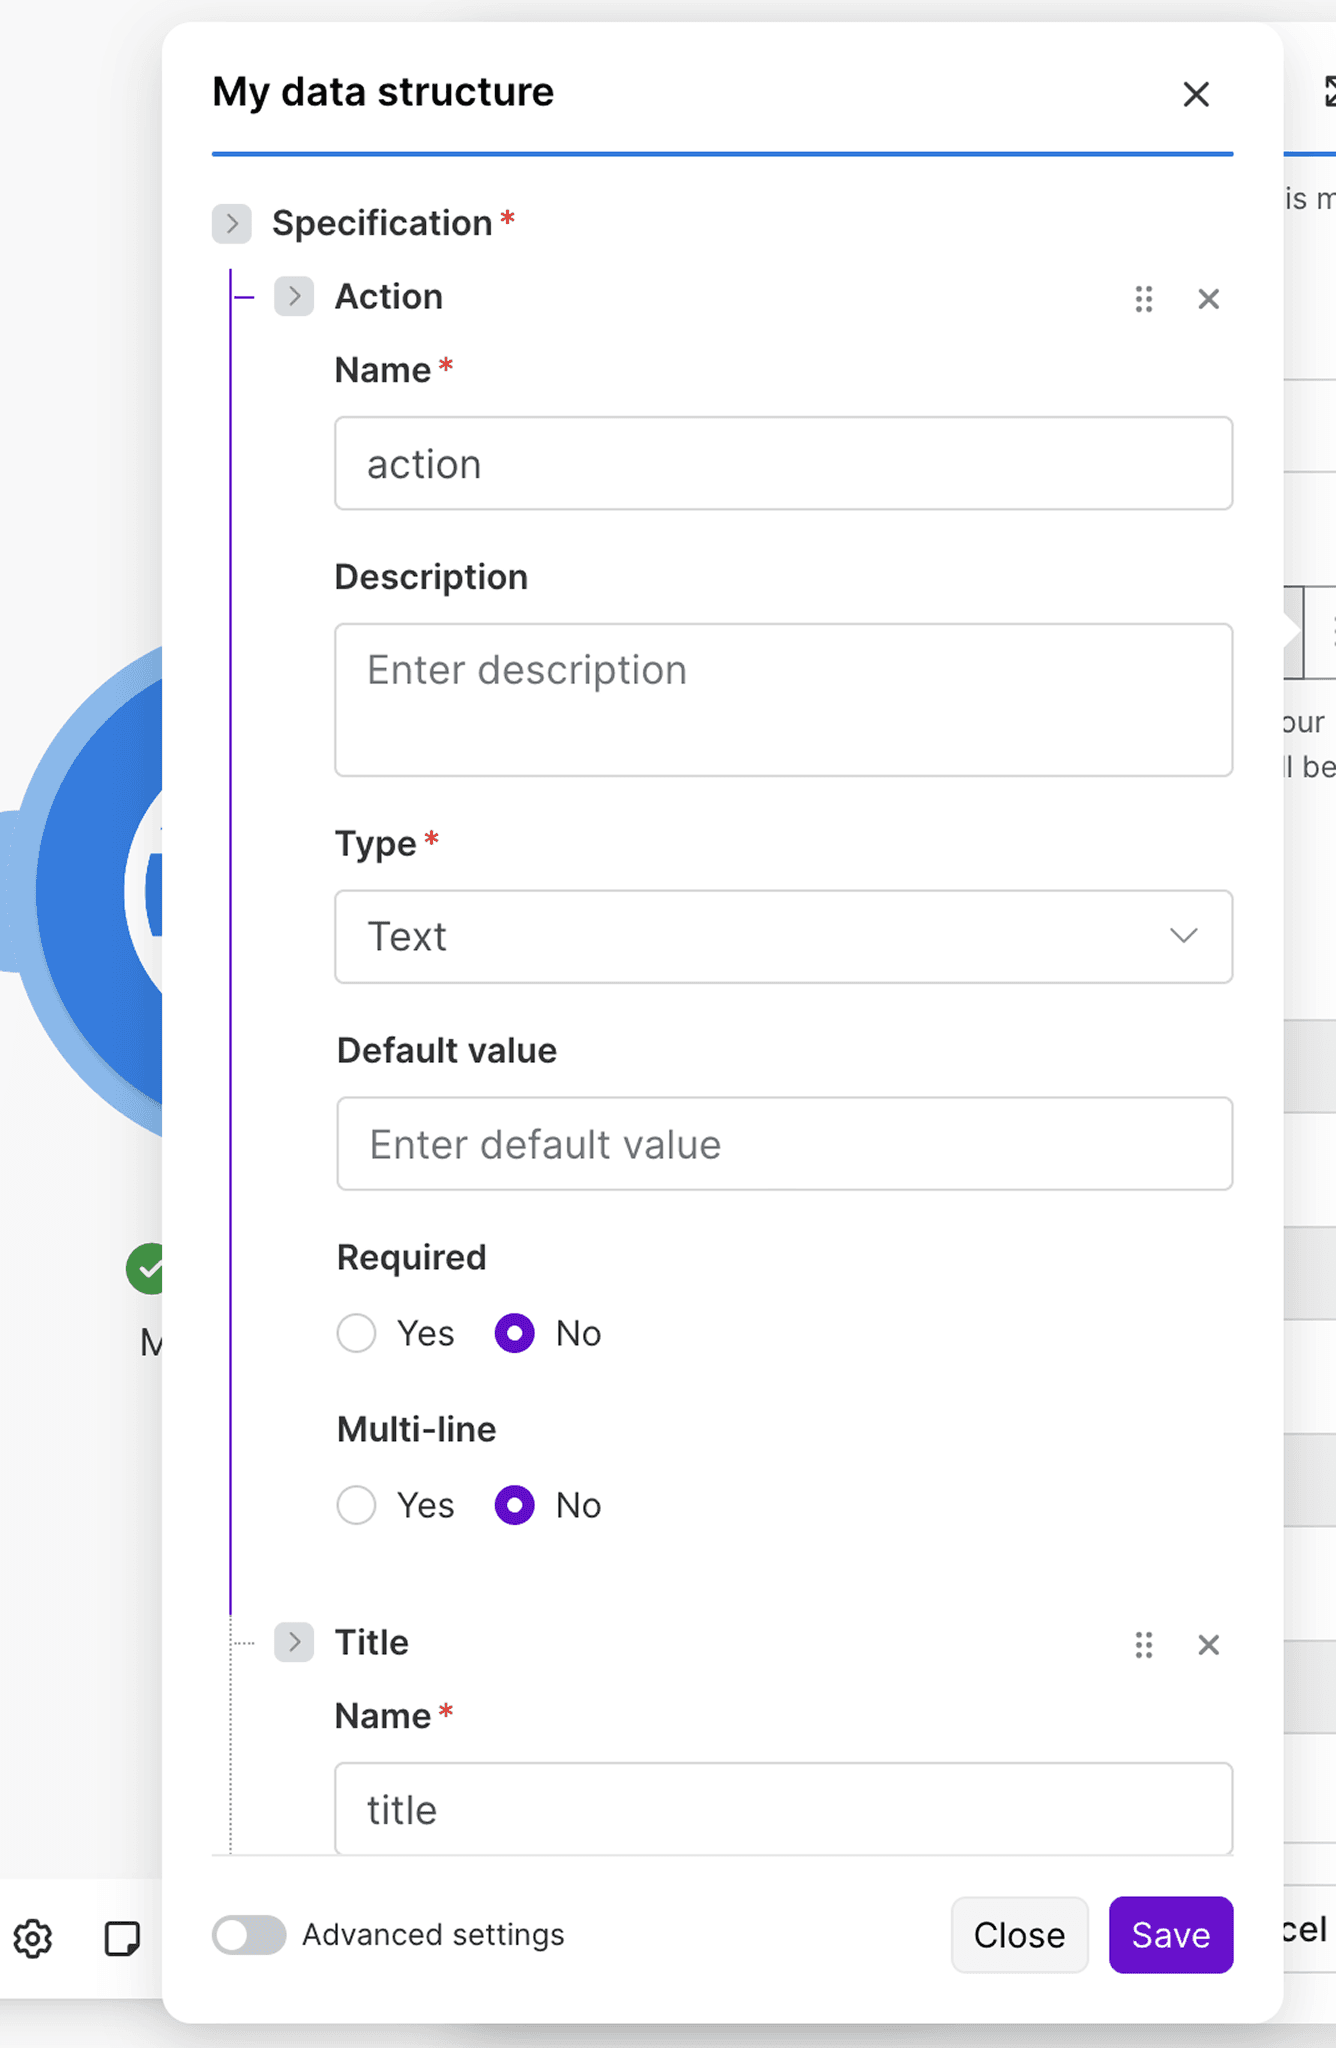
Click Save.
Mapping Parameters to Linear
In the Body content section, map the fields as follows (click on the empty field to select values):
action→createid→ select Issue IDtitle→ select Titledescription→ select Descriptiondue_date→ select Due Date

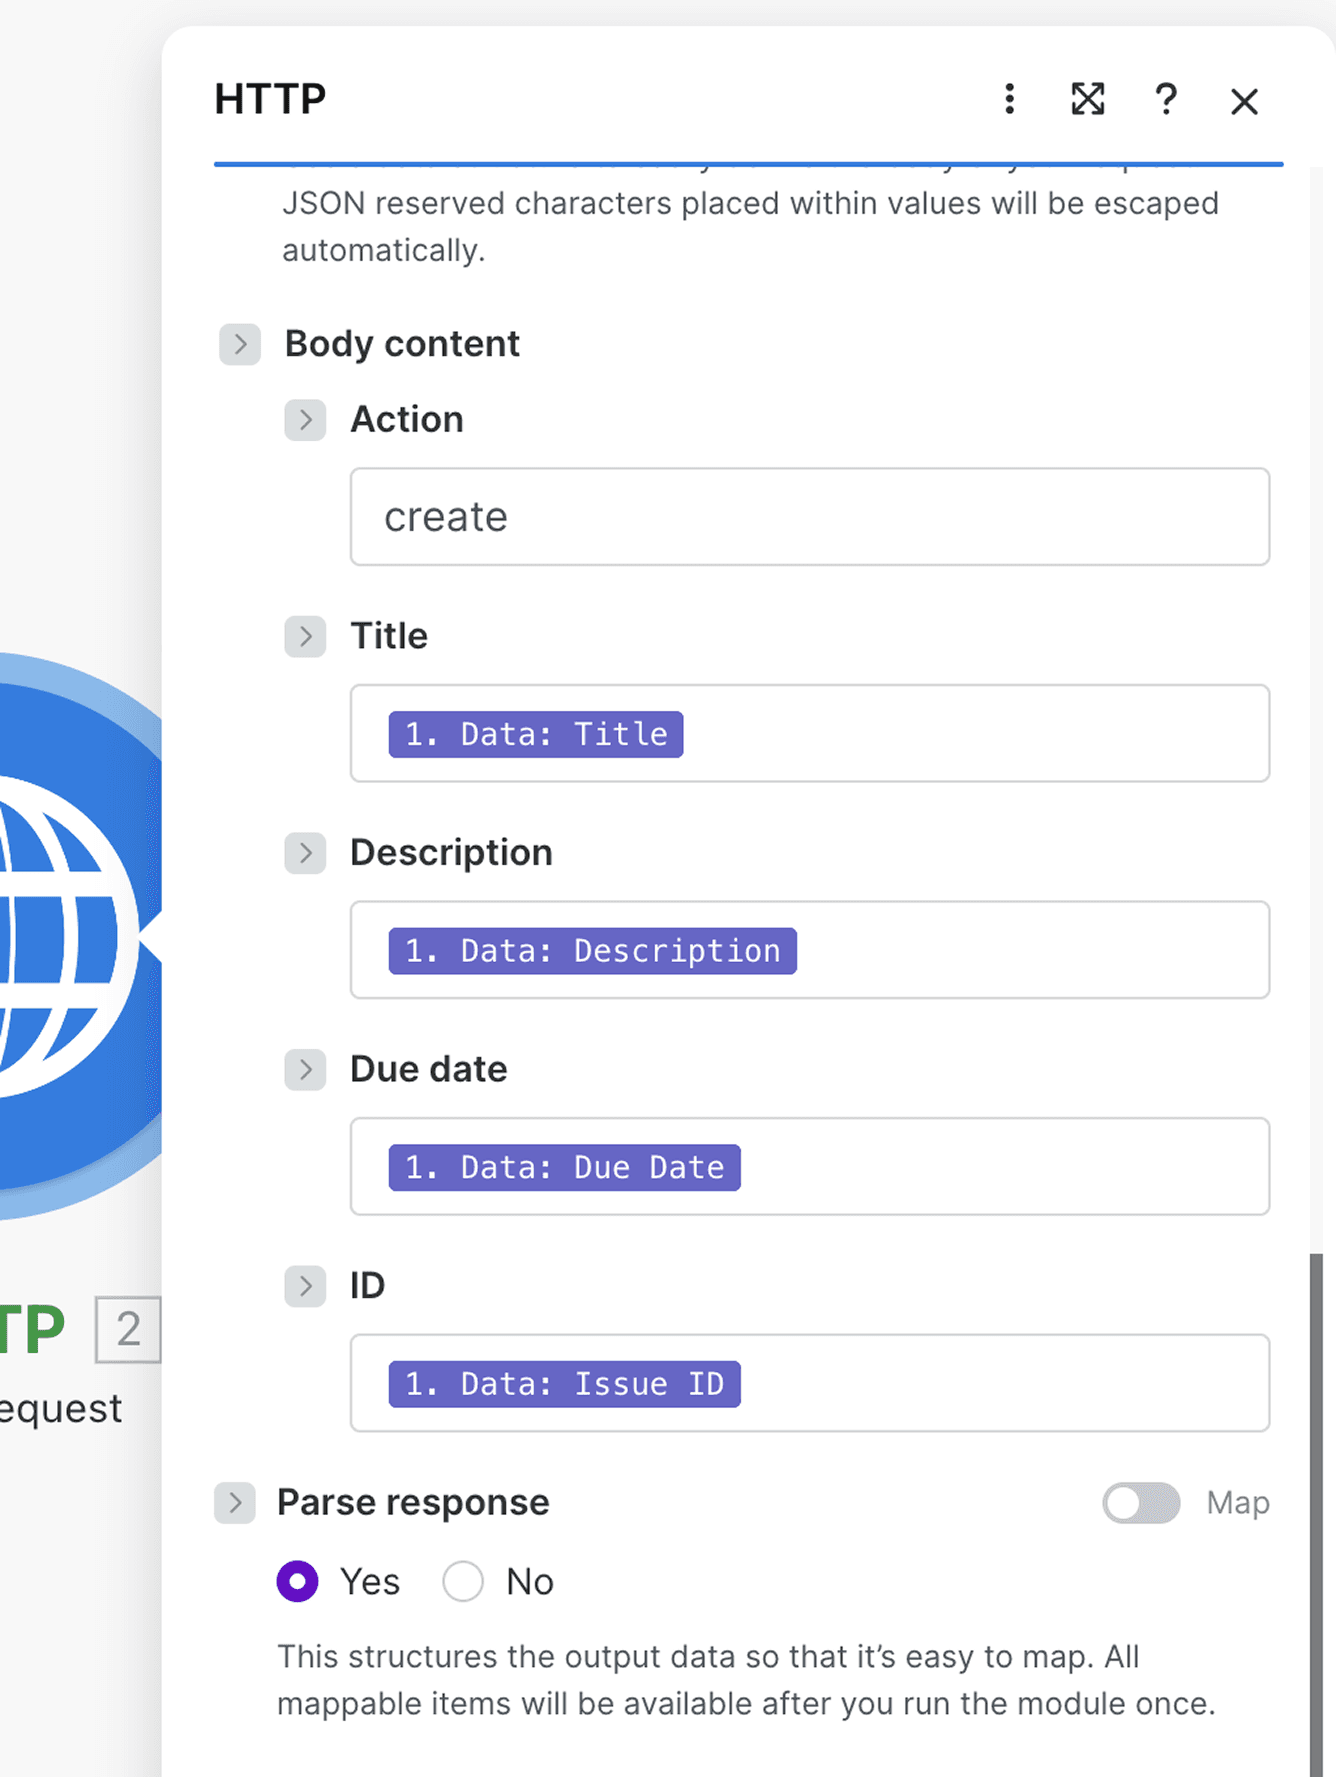
Note: Optional fields such as
urlorestimatecan also be included if needed. For a complete list of supported fields, open the Guide tab inside the relevant Blitzit list.
Click Save once mapping is complete.
Testing the Scenario
Press Run once. Make will wait for a trigger event.
Create a new issue in Linear.
If everything is set up correctly, the issue will be sent to Blitzit and appear as a new task.
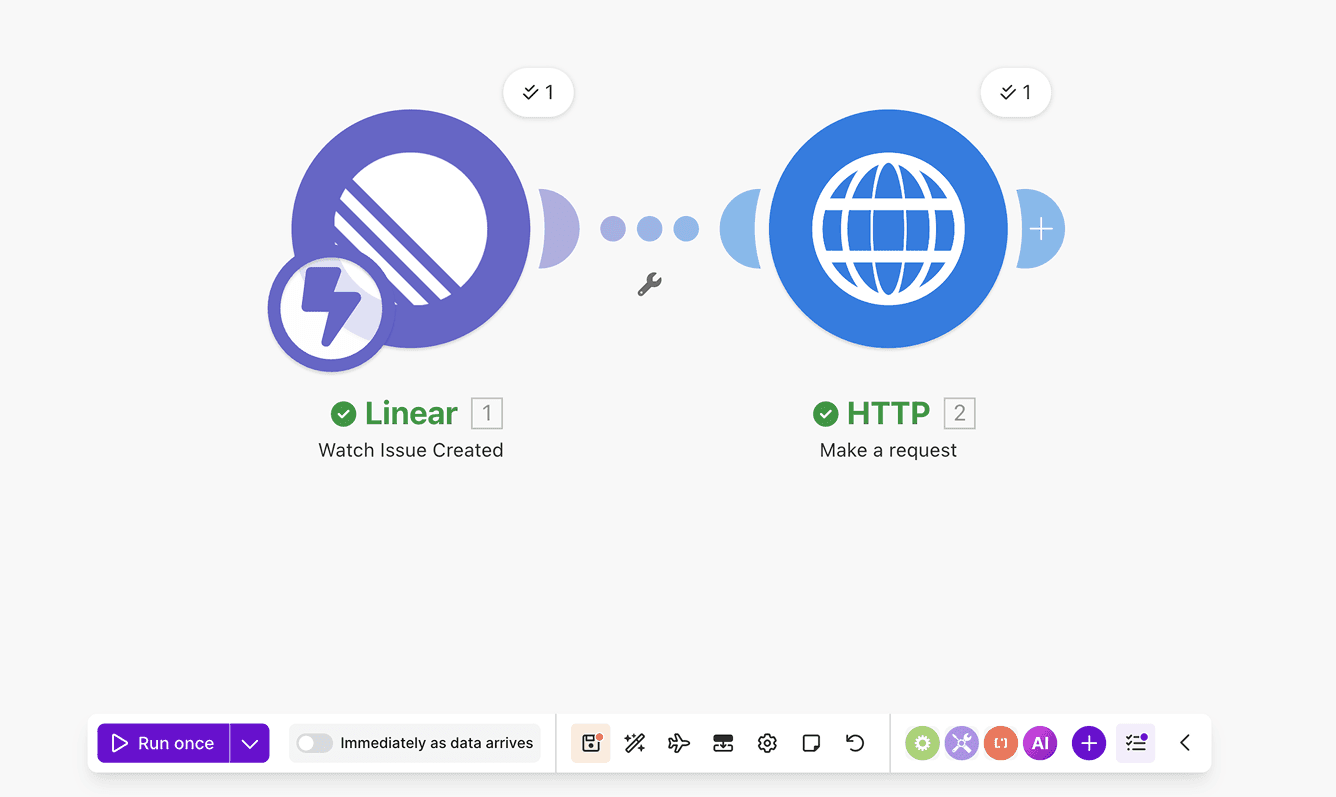
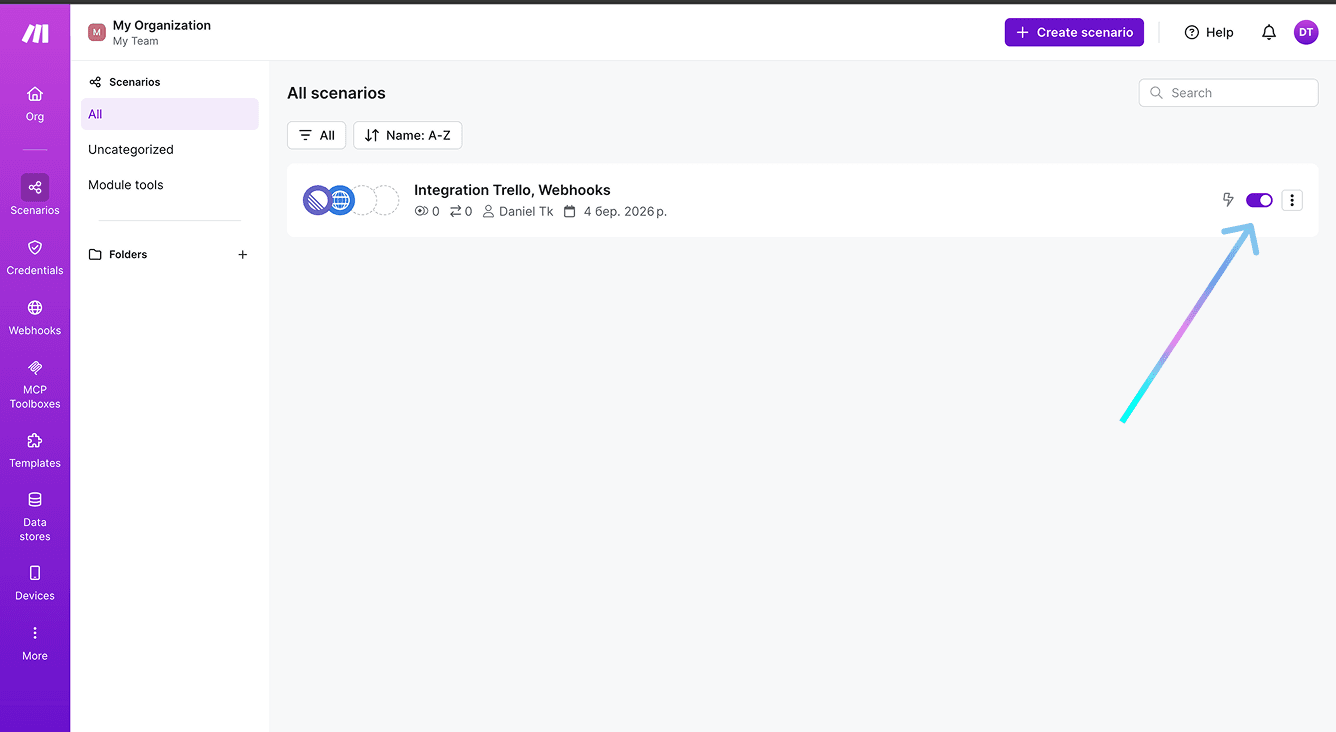
Go to the Scenarios list in Make and enable the newly created scenario.
Similar to this, you can connect webhooks with other apps.
Note: This integration is one-way only. We’re working on two-way support and appreciate your feedback.
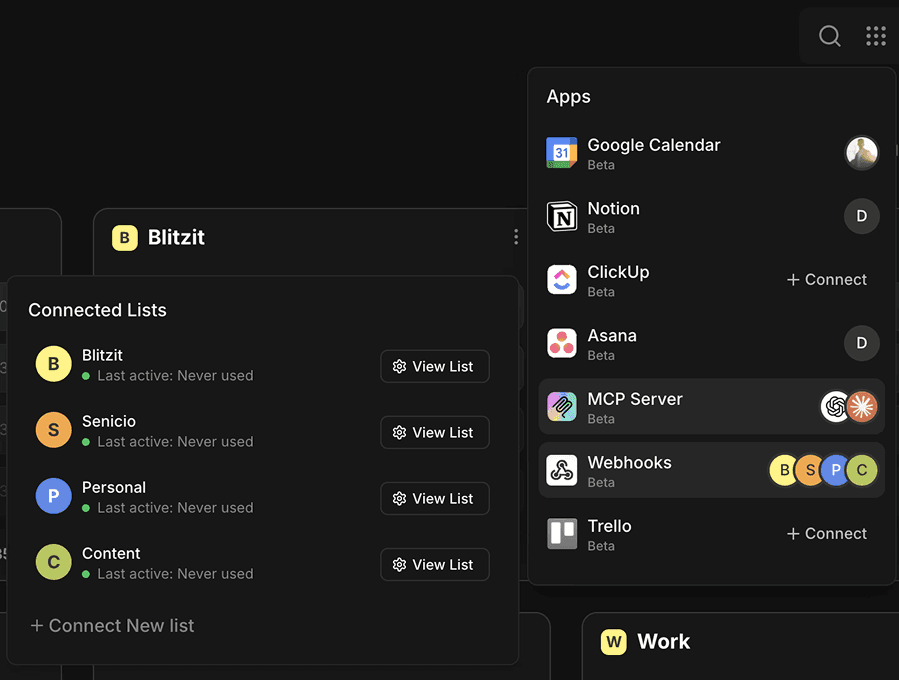
Using the Integration
From the Home screen in Blitzit, open the Integrations dashboard (⋮⋮⋮ > Webhooks) to:
View all connected lists
Click View List to open any list
Click Connect New List to add more
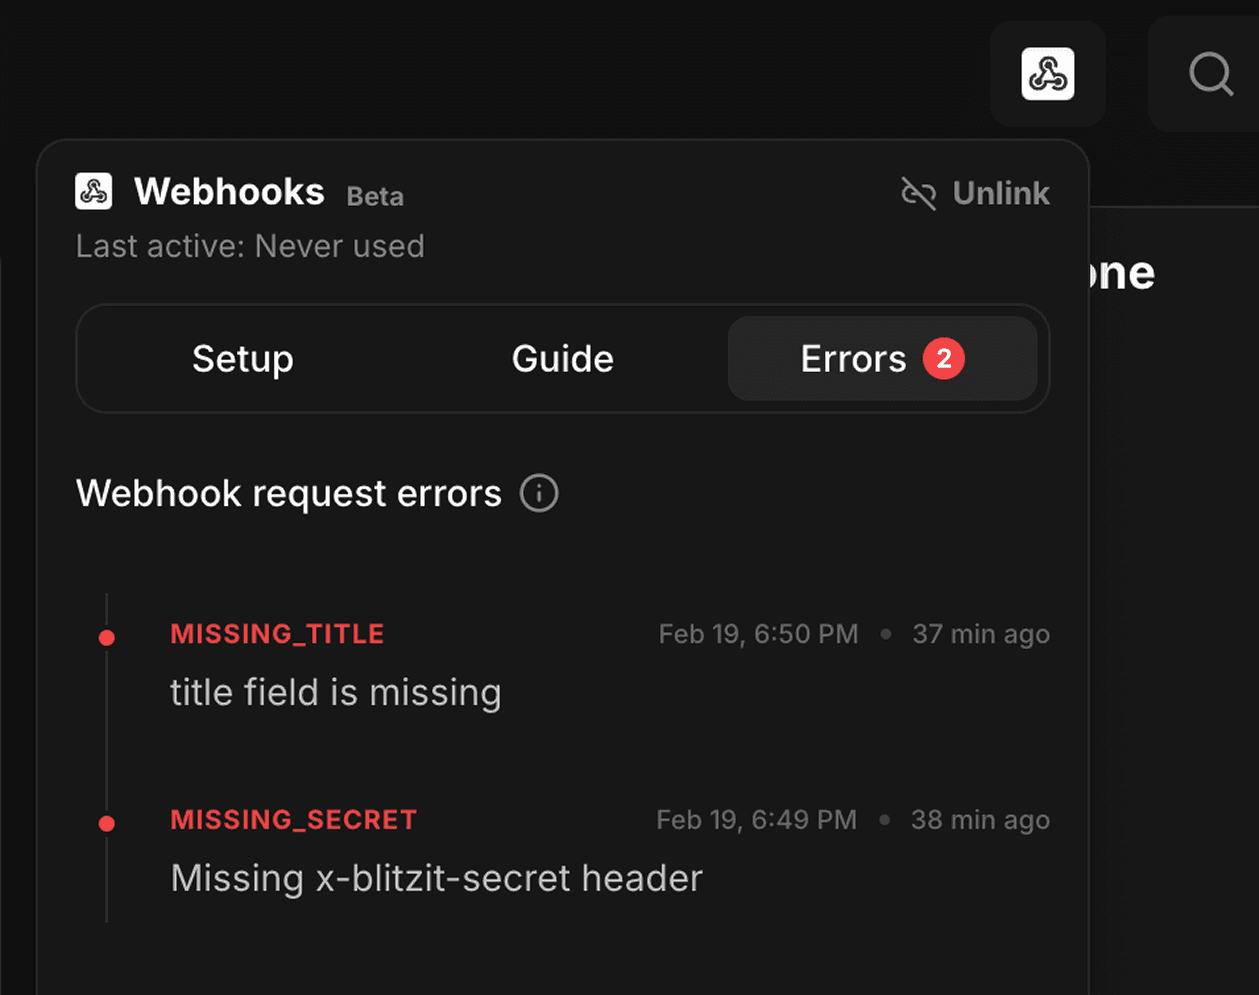
In any connected list, clicking the Webhooks icon (top right) opens settings with:
Toggle to enable or disable the webhook
Unlink button to disconnect the list completely
Guide tab showing payload field references
Errors tab showing issues (if any)