
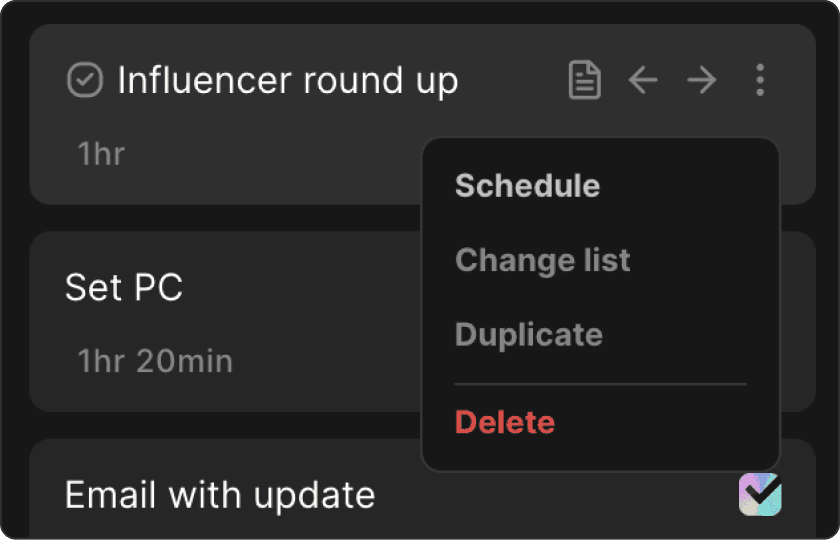
Accessing Schedule Settings
To open the schedule popup, hover over a task, open the expanded menu, and click Schedule.
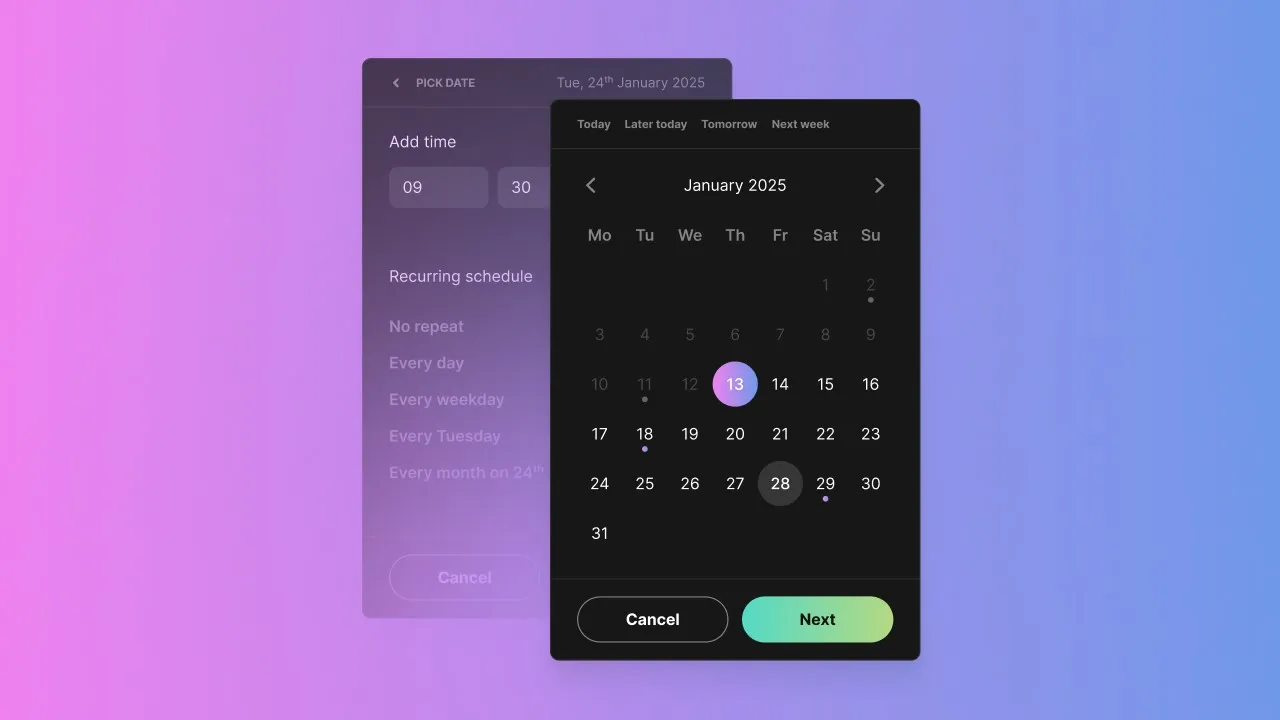
Setting a Scheduled Date
In the schedule popup, choose the date you want the task to be due.
You can select any date from the date picker or use the shortcut options above it:
Today — Sets today’s date
Later today — Sets today’s date, 2 hours from your current time
Tomorrow — Sets tomorrow’s date
Next week — Sets the date exactly 7 days from today
After choosing a date, click Next.
On the second screen, you can add a specific time by clicking + ADD next to Add Time.
If you don’t set a specific time, the task will simply move to the Today column on its due date.
Finally, click Schedule to confirm.
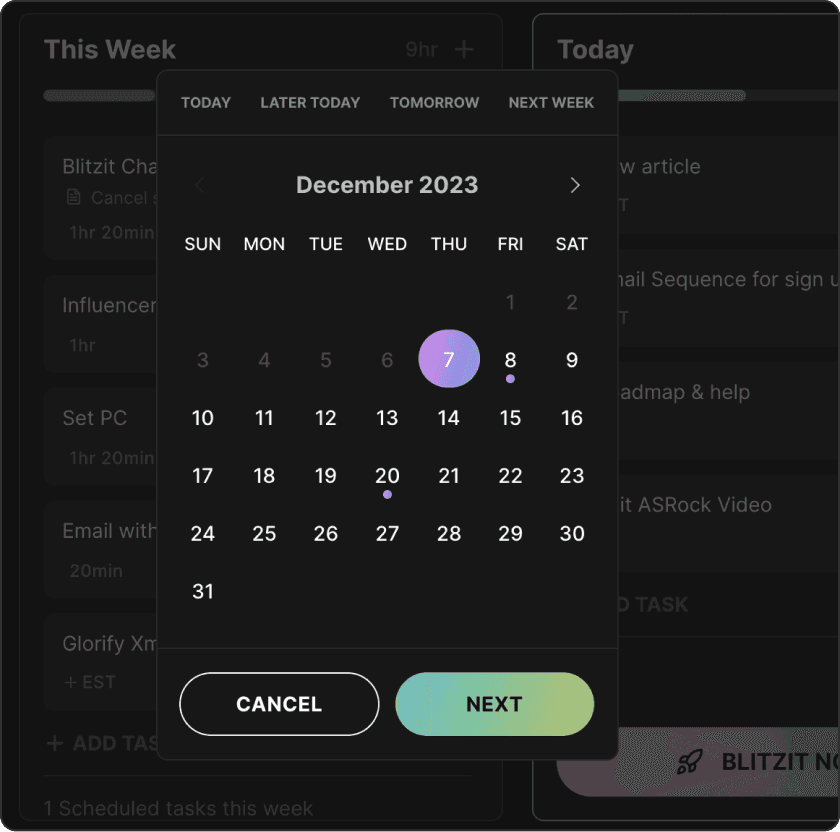
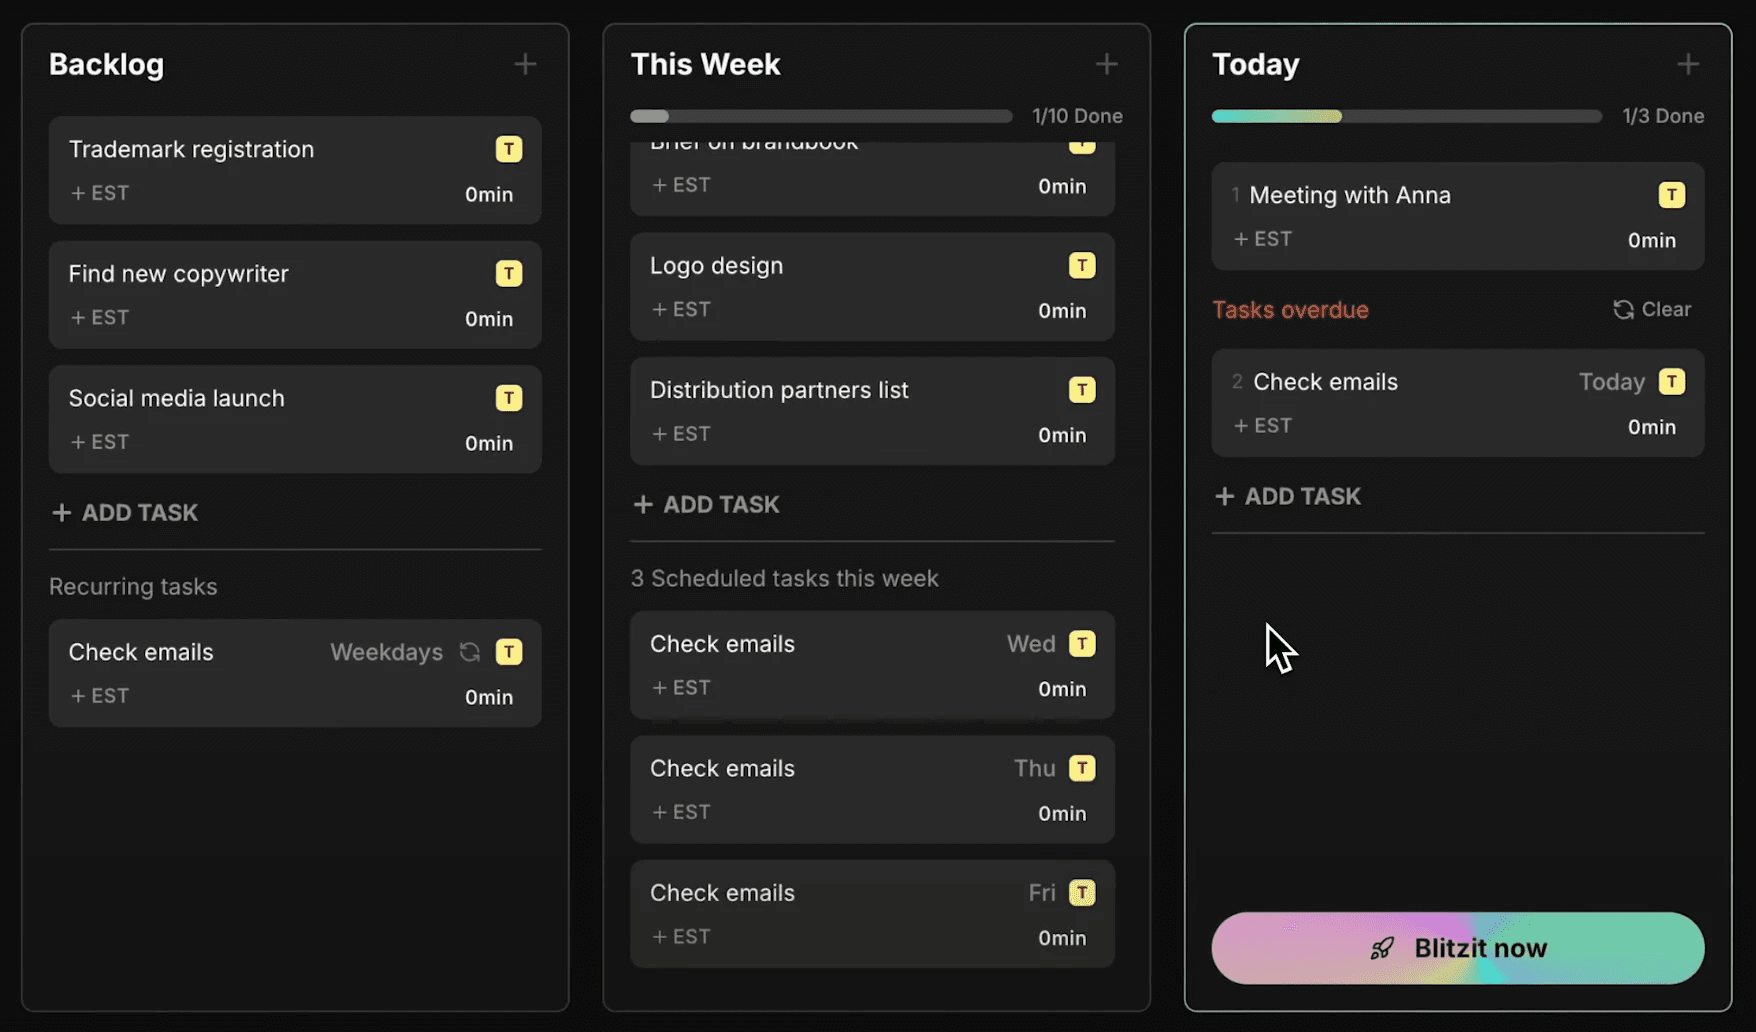
Where scheduled tasks appear
Scheduled tasks are shown at the bottom of the relevant list column.
Example:
If you schedule a task for tomorrow, it will appear at the bottom of the This Week column.
The next day, it will automatically move to your Today column.
Recurring Schedules
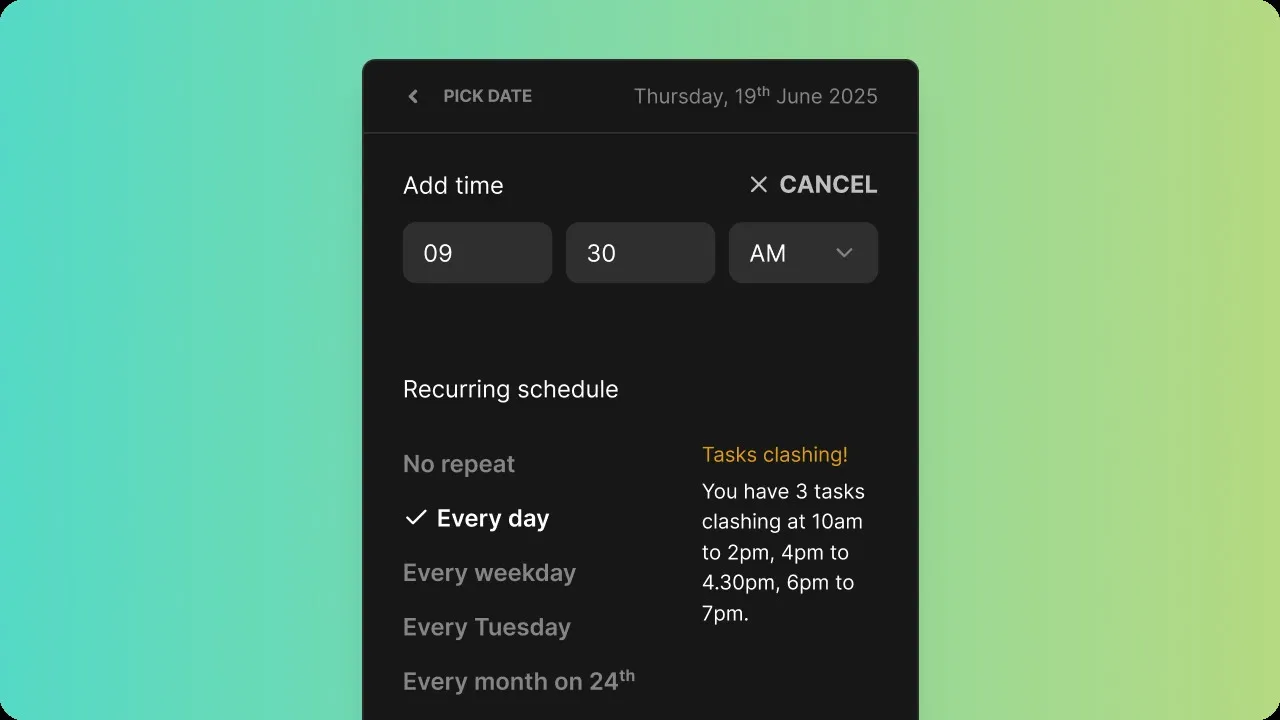
On the second screen, you can set your task to repeat. Recurring choices appear based on the date you selected:
Every day — Schedules the task for every day of the week
Every weekday — Schedules the task for Monday to Friday
Weekly (e.g. “Every Thursday”) — Repeats on the same weekday as the date you selected
Monthly (e.g. “Every month on 7th”) — Repeats on the same calendar date you selected (e.g. the 7th of each month)

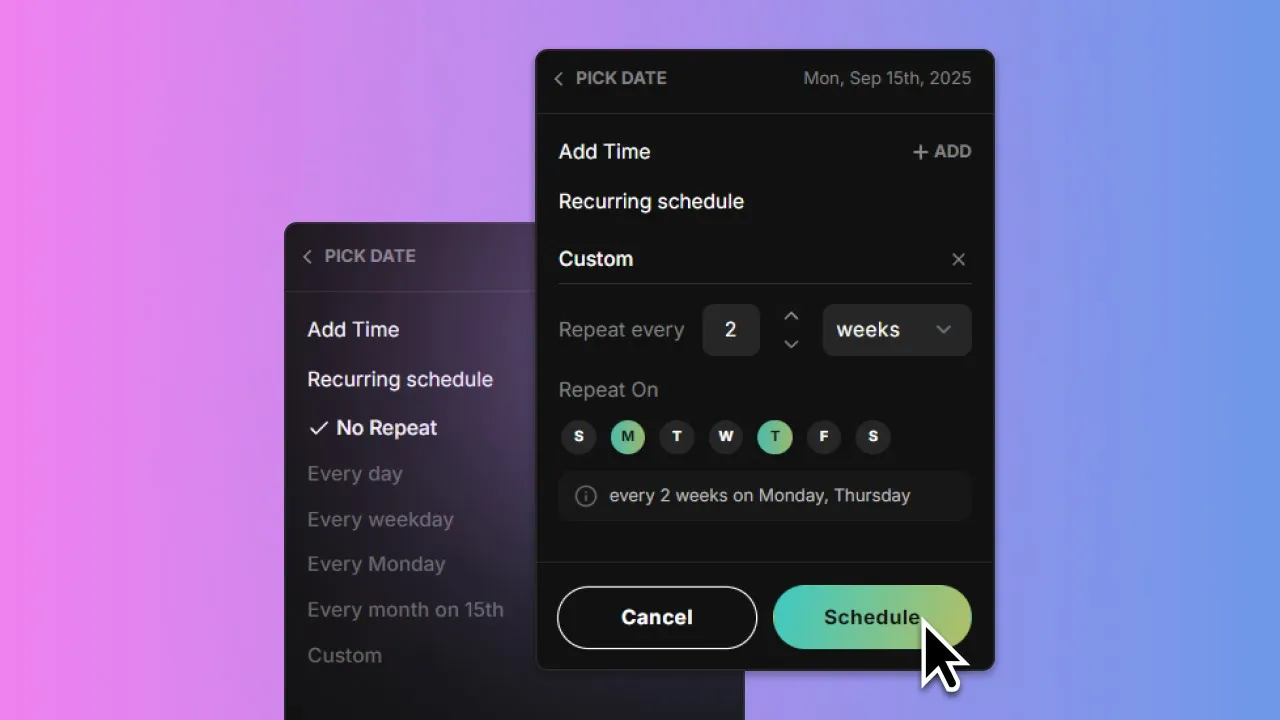
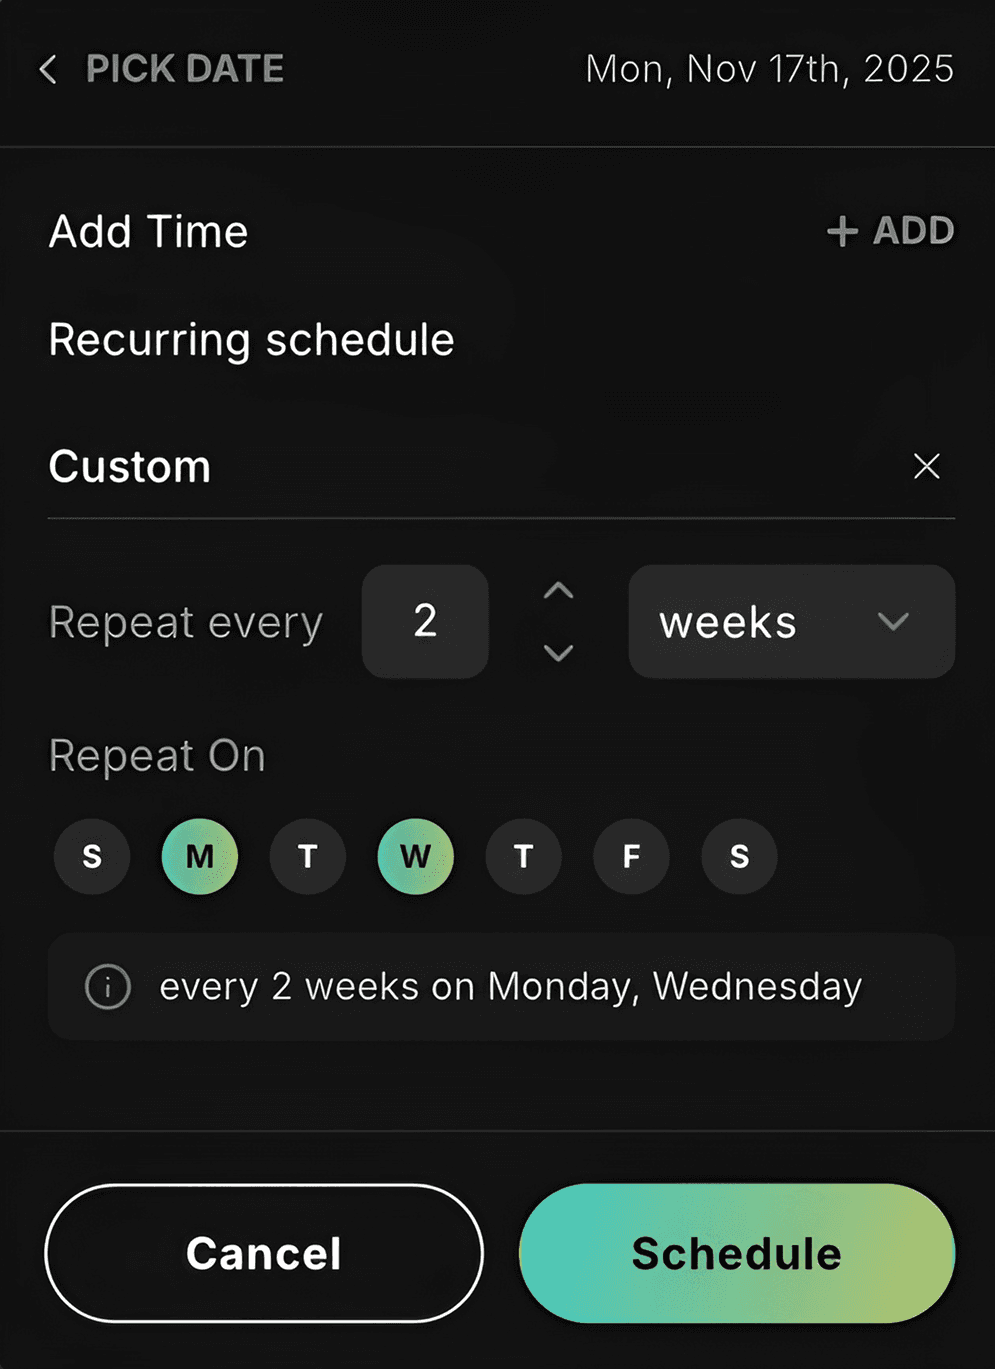
Custom Recurrence
The Custom option gives you full control:
Choose the interval number
Choose the interval type: days, weeks, months, or years
For weeks and months, you can select specific weekdays
Blitzit also shows a short natural-language summary (next to the exclamation icon), such as:
every 3 days
every 4 weeks on Monday and Friday
How recurring tasks behave
When you create a recurring schedule:
Blitzit creates a recurring parent task in Backlog
The system automatically creates child tasks on the Monday of the week when they are due
Child tasks behave like normal scheduled tasks
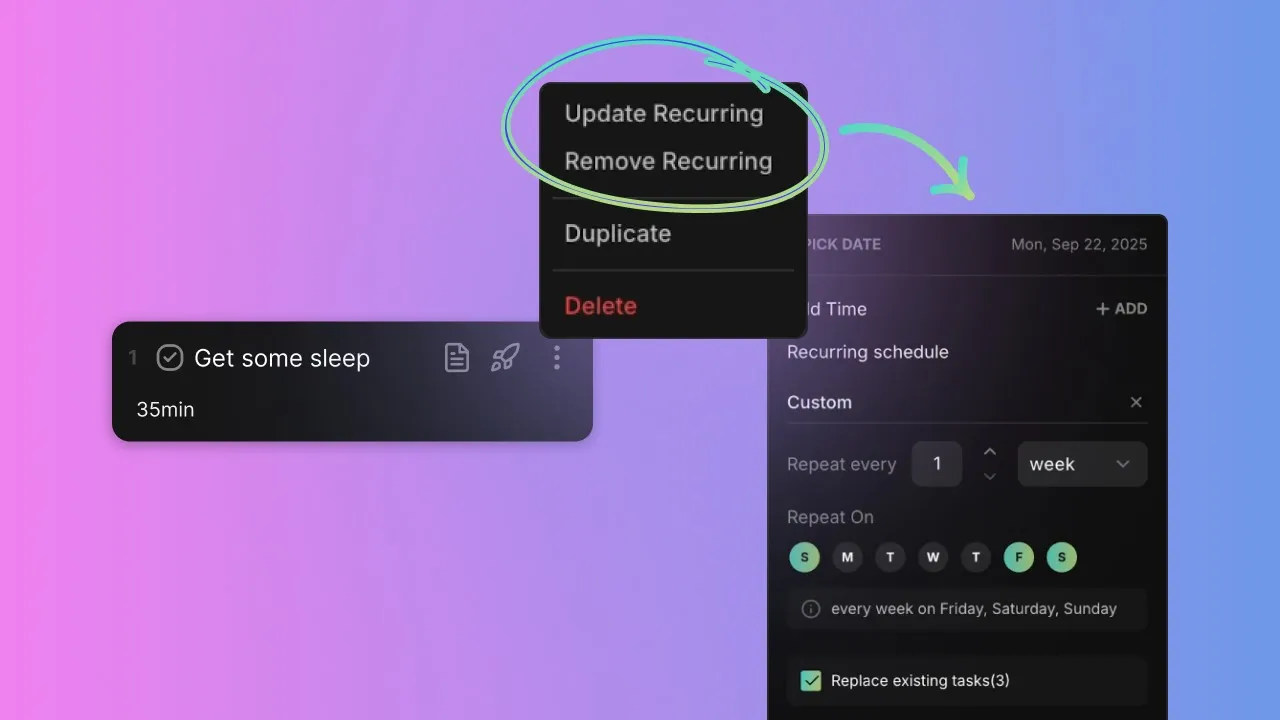
Editing or Deleting Schedules
To update an existing schedule, hover over the task, open the expanded menu, and click Update Schedule.
If the task is part of a recurring schedule, you will see two additional options:
Replace Existing Tasks
Use this to completely reset the recurring pattern.
Example:
If your task repeated daily but you change it to only Fri–Sun, choosing Replace removes the old daily tasks and keeps only the new ones.
If you do not select Replace, existing child tasks remain, and new ones are added alongside them.

Delete Existing Tasks
Use this to stop the recurrence entirely.
To do this:
Change the pattern to No Repeat, and
Select Delete existing tasks
This removes the recurring link and leaves the task as a single non-recurring item.

Important: Detaching Recurring Schedules
Removing a recurring schedule from the expanded menu detaches the parent task from all its child tasks.
If you later create a new recurring schedule for the same task:
The Replace option will no longer appear
New child tasks will be added normally
Old child tasks will remain as independent tasks
This prevents Blitzit from overwriting any modifications you made to older child tasks (renaming, adding notes, changing EST, etc.) and gives you the choice between continuing with the existing tasks or starting fresh.